Packing Particulars: Your Suitcase Strategy
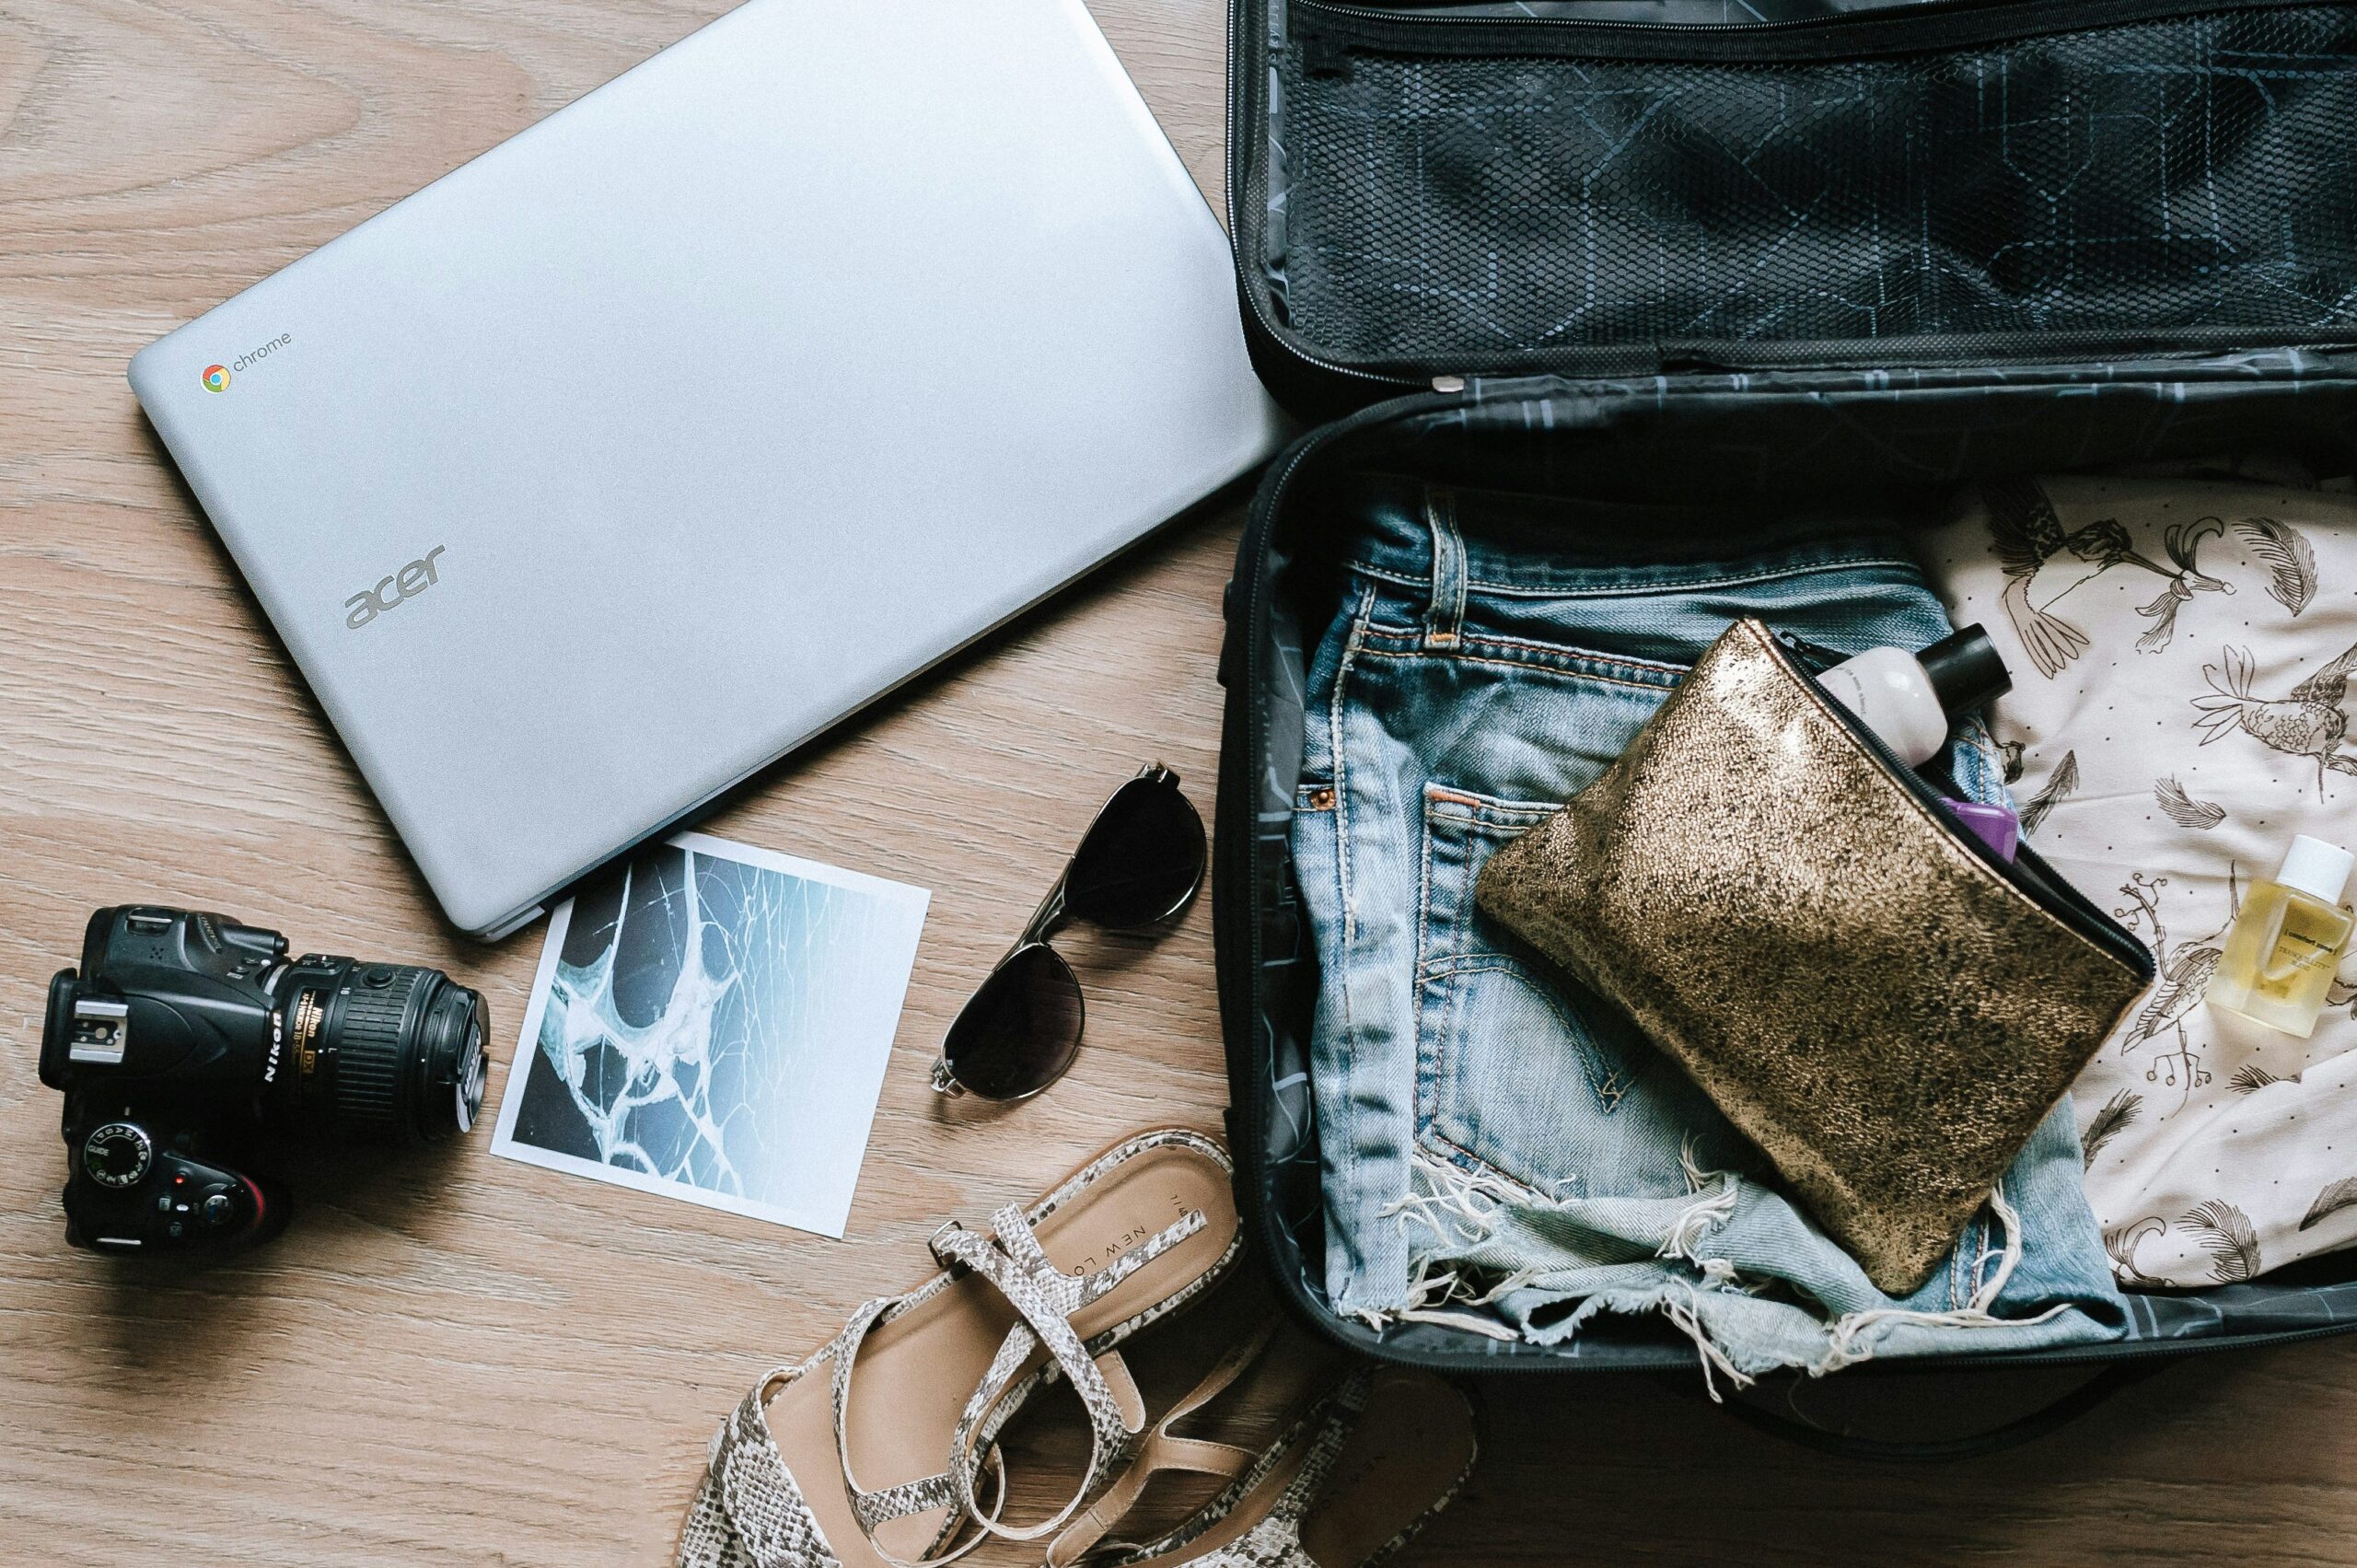
Packing for an epic trip is like playing a high-stakes game of Tetris. Space, weight, and organization are your only allies — and every piece matters. A good travel packing guide keeps you from overstuffing, overspending, or unraveling in the middle of a crowded airport. You want gear that multitasks, doesn’t tip the scale, and won’t have you tearing apart your bag in a frenzy every single stop.
After years of chaotic trial and error (and more than one suitcase blowout), here’s the road map to packing well — a system that works whether you’re heading out for a week, a month, or a once-in-a-lifetime adventure.
🧳 Suitcases & the Tools That Tame Them
One of my key strategies is simple: multiple bags = less chaos. I almost always bring four on major trips — two checked, two carry-ons. On the first and last flights, that setup helps me spread out the weight so nothing tips over the limit. Once I’m actually traveling, the smaller checked bag holds my daily-use stuff, while the big one is for the gear I only need at specific legs of the trip.
Inside those four bags? Absolute cube-and-pouch obsession. Compression cubes for clothes (sorted either by type — shirts, pants — or by segment of the trip), and zippered pouches or reusable bags for everything else. Toiletries, electronics, makeup, first aid kits… nothing rolls loose in my luggage. And the smaller and more specific each category is, the easier it is to grab what I need without upending my suitcase.
🎯 Core Moves in My Luggage Strategy
- Security first. The last thing you want is a pickpocket grabbing your essentials. Look for travel-focused bags with anti-theft features, locks, or hidden compartments for documents and valuables.
- Rolling bag style matters. I’m firmly Team One-Side-Opens (like a trunk) over clamshell. It takes up less floor space in your lodging, and allows more packing flexibility. Soft-sided bags usually do this by default, but some hard shells are catching up — and they’re my favorites.
- Pieces that work together. Assume you’ll have to move everything by yourself. Two backpacks could work, but I prefer a crossbody + backpack combo. And every carry bag should ride securely on your rollers — this cheap, handy strap keeps everything together, so I don’t have to.
- Why I carry on a roller instead of a backpack. Electronics and “can’t lose” essentials belong in your carry-on — but I don’t want all that weight digging into my shoulders while I’m slogging through airports. With a roller, the bag itself does the heavy lifting, and my personal item can sit right on top.
- Personal Item. This messenger bag or this backpack bag carries everything I’ll need during the flight itself – I love both for different reasons, so I pick the one that complements my other luggage best.
- Spacious main compartment (bonus if you can organize with mini cubes).
- Exterior pockets for quick airport access — but keep documents secure (think zippers close to your body or tucked inside the main compartment).
- Extras I love: a water bottle pocket, key clips (I live in fear of losing my house keys while abroad), sunglass slots, and the ability to double as a day bag.
- Rolling Carry-On. My holy grail bag has:
- A single main compartment that opens from one side (no clam shell).
- Hard sides to protect fragile items and electronics.
- Spinner wheels, not the old-school single-direction kind.
- A telescoping handle strong enough to hold my personal item.
- Hooks and even a cup holder — because sometimes it’s the little things.
- Large Rolling Bag. Non-negotiable: four spinner wheels. If you’ve ever tried to haul 50 lbs at a tilt, plus a bag stacked on top, you know why. I like a large compartment with a hinged lid, preferably in a hard shell.
- Smaller Checked Bag. Two rollers are manageable, three is chaos. For my second checked piece, I want something that straps to the big one but can also be carried hands-free if needed. My new favorite is this vacuum-seal expandable travel backpack — it even has a built-in pump to compress your load, plus a TSA lock and water resistance. It’s basically the next-gen version of my trusty Patagonia that lasted me a decade.
🎭Supporting Cast: The Organizers
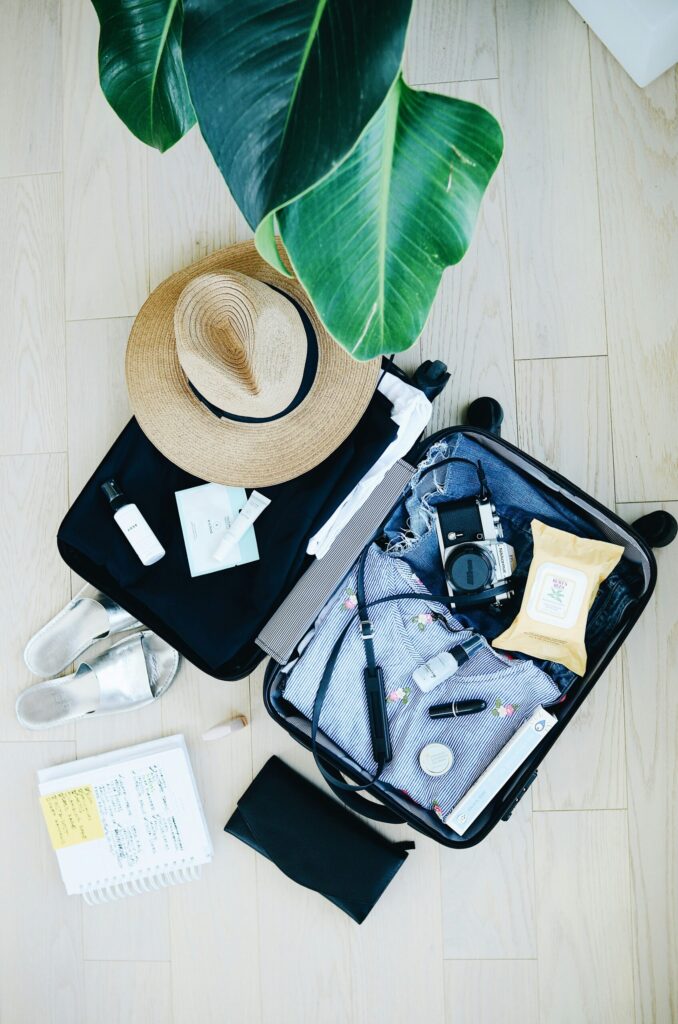
The real secret to stress-free packing? Keeping everything contained. Cubes, pouches, and organizers make your life infinitely easier when you’re digging through bags in a hotel room at midnight. With the right setup, you’ll know exactly where everything lives — no more chaos explosions on the bed.
Here are my go-to categories (with links to my favorites):
- Compression Packing Cube Set — I don’t always compress them, but I love having the option. And when I’m bringing winter gear or sweaters, this XL Cube is perfect!
- Bucket Toiletry Bag — great for all my countertop stuff, especially if you’re sharing a small space or moving around a lot.
- Hanging Toiletry Bag — my newest find this one is much slimmer and more packable, and perfect for shower gear, paired with the bucket bag for counter stuff.
- All-in-One Toiletry Bag — when I need everything in one place.
- Reusable Ziplocks — endlessly handy for snacks, small toiletries, and random chaos.
- Stasher Bags — waterproof, tough, and great for messier items.
- Large Electronics Organizer — when I’m hauling a lot of cords, cameras, and accessories, I love something bigger, that keeps the tech tangle under control.
- Shoe Bags — these Clear Waterproof Shoe Bags keep dirty soles from messing with your clean clothes. And you never know when an extra water proof bag will come in handy!
- Cord Organizers — sometimes I just need a small fix, and these leather cord clips to keep chargers and stray cables tamed. These reusable silicone zip ties are great for larger cords, like for my laptop.
- Pill Organizers — I use this one as a two-week box by treating each AM or PM slot as one day, or if I’m going for a really long trip, this one works for a month or more and keeps my whole medicine chest in one place.
- Jewelry Storage — pill boxes work surprisingly well to wrangle necklaces and earrings, like with this compact model; or go classic with the BAGSMART Jewelry Organizer Roll.
- Laundry Bags — I like these JHX Travel Laundry Bags for corralling the dirties — lightweight, washable, and easy to separate.
- Document Organizer — a lifesaver for passports, boarding passes, and cards. My go-to is the DEFWAY Passport Holder.
🧴 From Toothbrush to Toner: Toiletry Tactics
The fastest way to save space and weight? Overhaul your toiletries. Most of what we use at home is full of water and only does one job. On the road, I switch to solid shampoo/conditioner bars, my trusty lavender goat milk soap bar, and toothpaste tablets — all tiny, packable, and water-free.
I also love multitaskers. For example, my Bioré UV Aqua Rich Daily Hydrating Moisturizer with SPF 50 does double duty as sunscreen and face lotion. Cutting down on liquids and doubling up on uses saves me serious space (and saves me from cleaning shampoo explosions in my bag).
This is one of my favorite areas to trim the fat when I’m packing, so I put together a whole guide to my travel-friendly products — you can check out the full list here.
⛑️ First Aid: Preparing for Predictable Problems
You don’t need to prepare for major emergencies (if a gorilla rips off my arm or I tumble down a mountain, trust me — I’ll need a doctor, not a Band-Aid). But you do want to be ready for the minor aches and pains that come with long days of travel: headaches, scrapes, sunburns, and upset tummies.
The goal: cover the basics without weighing yourself down (or spiraling into panic over worst-case scenarios). This is not medical advice — just my personal kit based on experience, and all over-the-counter.
Here’s what I carry:
- Pain reliever / anti-inflammatory (ibuprofen or similar)
- Antihistamine (allergy relief)
- Antacid tablets (like Tums)
- Anti-diarrheal pills (Imodium)
- Anti-constipation remedies (laxative, fiber pills, or magnesium)
- Stomach soother (Pepto-Bismol tablets)
- Rehydrator (Pedialyte powder packs)
- Itchy solutions (cortisone cream, After Bite stick)
- Burn soothers (aloe, Aquaphor)
- Blister patches / moleskin
- Adhesive bandages — regular, finger, and XL cloth
- Antiseptic (hand sanitizer or alcohol wipes)
- Antibiotic ointment (Neosporin)
- Tweezers (for splinters, ticks, cactus spines — ask me how I know)
- Traveler’s diarrhea kit: electrolyte powders or tablets, plus Travelan and DiaResQ
🎒 Everyday Travel Essentials That Can Make or Break
When you’re out exploring, you’ll need more than just your wallet and phone. These are the items I never leave behind — and the specific versions I love to bring along:
- Day Pack — I’m a crossbody fan for easy access and security. One roomy compartment plus smaller pouches keeps me organized. I rotate between this sling backpack for active days or shorter treks, this backpack when I’m headed into nature for the day, and this day bag with a ton of security features for city adventures.
- Water Bottle — I own approximately 57 bottles, but when traveling I narrow it down:
- Large: Durable, insulated, and with a hook/handle so I can clip it outside my pack. Perfect for treks. (My favorite carabiners make this easy.)
- Small: Lightweight, slips in a bag, and easy to refill in cities — saves your back from lugging around a giant jug.
- Bonus: A LifeStraw or bottle with built-in filtration for those “hmm, is this safe to drink?” moments.
- Rain Gear — Either a packable rain jacket or a compact umbrella.
- Waterproof Phone Pouch — Essential for waterfall hikes, boat rides, or anywhere your phone might take a dip.
- Travel Towel — Small and fast-drying, but versatile enough for picnics, extra layers, or emergency spills.
- Dry Bag — If your pack isn’t waterproof, this keeps electronics and sensitive items safe. Bonus: doubles as an organizer when it’s not protecting from splashes. And this one is super light and folds down reeeeeal small until you need it!
- Random-but-Brilliant Tools — Sometimes it’s the weird little things that save the day. I always toss in a few MVPs: carabiners, safety pins, clothes pins, hair ties, super glue, a travel clothesline or bungee cord, and even a pillowcase. I also keep a few tiny extras on hand: a mini flashlight, a pocket roll of duct tape, zip ties, and a sleep mask with earplugs. You won’t always know what you’ll use them for — but you’ll be very glad you packed them.
- PRO TIP: The 5 Things I Always Pack — No matter the destination: swimsuit, waterproof phone case, hat (shady for summer, warm for winter – or both for the crazy trips), flip flops, and fiber pills. Small, lightweight, and absolute lifesavers. Forget one, regret it later.
⚡ Charged & Ready: Electronics & Adapter
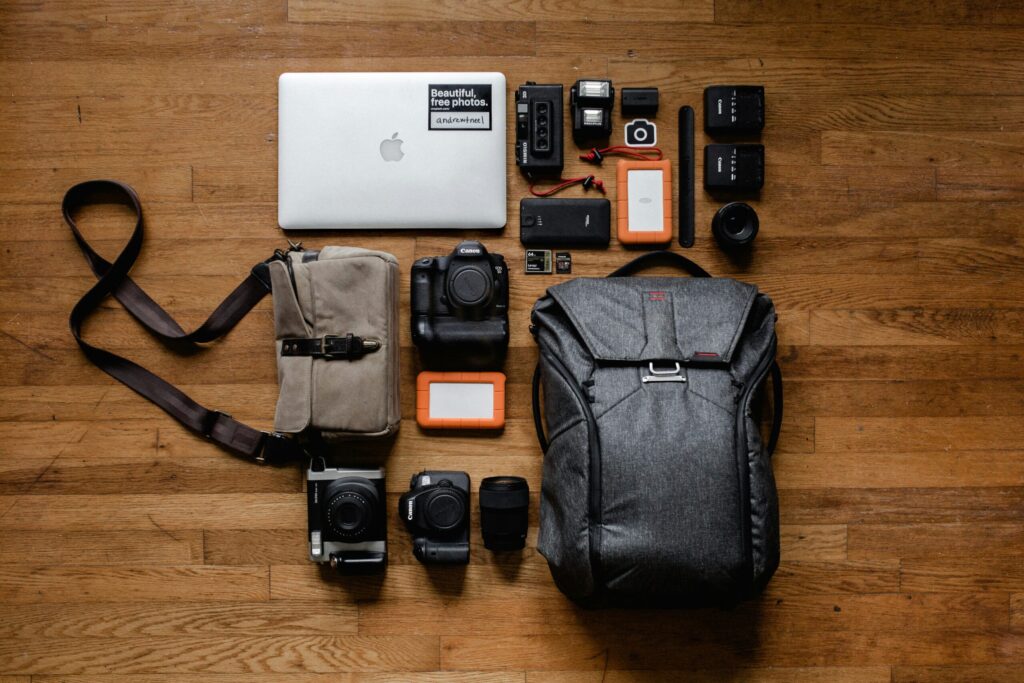
Travel is hard enough without a dead phone, and hotel outlets are a cruel joke. Between your phone, earbuds, watch, Kindle, and camera, you’ll be fighting for plugs unless you bring your own setup. Here are all my strategies and top picks so you can stay powered up — without blowing a fuse in your brain.
- Universal Travel Adapter — One solid adapter with multiple plug types = peace of mind. Skip the cheap ones; look for sturdy, grounded versions that won’t fall apart after a week.
- Voltage Converter (if you need it) — Essential if you’re bringing heat tools (hair dryers, straighteners) from the US. Most modern electronics (phones, laptops, cameras) already handle 110–220V, so check your devices first.
- All-in-One Device — Or, do it all with one powerhouse: a charging station that includes multiple USB/USB-C ports, standard plug slots, and built-in international adapters, voltage conversion, and surge protection. It’s a lifesaver in places where power surges are common (looking at you, Southeast Asia). But make sure you check your specific country’s plug type – there are some extremely specific ones out there (ahem, Africa!).
- Charging Station / Power Strip — If you’re not going all-in-one, bring a compact power strip with multiple ports and a long cord for awkward hotel layouts. Add a couple of 3-to-2 prong adapters for older outlets.
- Portable Power Banks — I like having two: a slim, lightweight bank for daily carry, and a bigger backup that can recharge my phone and camera several times over.
- Pro Tip: In countries with less stable electricity (hello, power surges!), charge your phone through your power bank instead of directly from the wall. If a surge fries anything, better a $30 charger than your $1,000 phone. In Thailand, my block kept everything topped up for days without a hiccup.
- Cables & Cord Management — Pack extras (because you will leave one behind in a hotel wall). I use my electronics organizer to keep chargers, cords, SD cards, and adapters from becoming a spaghetti monster.
- Optional Extras — Kindle (I might dies without mine), laptop/tablet if you’ll actually use it, and noise-canceling headphones if you value your sanity on long flights.
- PRO TIP – make sure every single electronic device and charger block is fully charged before leaving home.
📸 Capturing the Magic on Camera
When you’re heading out into the great wide world to see and do things you’ve never experienced before, you’ll probably want to bring some of those memories home with you. In my opinion, photos are the best souvenirs — I’m even turning my house into a personal gallery of my adventures.
Most of the time, your smartphone will be your best tool. The cameras today are superb, and unless you need super-fast shutter speed or want to capture something far away (like animals on safari or architectural details at the top of a cathedral), you don’t need to lug a full DSLR.
Most of the time, your smartphone will be your best tool. The cameras today are superb, and unless you need super-fast shutter speed or want to capture something far away (like animals on safari or architectural details at the top of a cathedral), you don’t need to lug a full DSLR.
If you are looking to get into a more serious photography hobby, I recommend the Canon Rebel T7. It’s simple enough for beginners to learn quickly, but powerful enough to deliver that satisfying step up in quality and control. The bundle I started with includes the camera plus all the basics — extra battery, lenses, tripod, and accessories — everything you need to get going without endless add-ons. And if you want a little extra help learning the buttons and dials, this Canon EOS Rebel T7 Pocket Guide is a great reference to have in your bag.
That being said, a few accessories (and a couple of stand-alone gadgets) can level up your phone photography big-time:
- Selfie Stick / Mini Tripod — Because my mom is the world’s worst photographer, and I’d rather have control over my own angles. Great for solos, group shots, or just avoiding 87 blurry photos of your chin. Bonus if it doubles as a Bluetooth remote (like the one linked).
- Portable Ring Light / Clip-On Light — Great for low-light selfies, food shots, or evening street scenes.
- Lens Attachments — Clip-on wide-angle or macro lenses can add new dimensions without upgrading your whole setup.
- Mini Body Cam — This wearable thumb-sized body cam is a cool middle ground between your phone and a GoPro. At around $60, it’s way cheaper than a full action cam, and super easy to use for hands-free video.
- Mini Action Cam — For water, sports, or anything where you want to be hands free and get shots you can’t with your phone (sky diving or snorkeling shots anyone?). I like this version by DJI – it’s higher rated and less expensive than the name brand GoPro. Add on this accessories kit and you can strap that sucker to almost any part of your body or any surface you choose!
- Extra Memory Cards / Storage — And if you need to offload quickly, this USB-C card reader/adapter connects SD or microSD cards straight to your phone or laptop (with a tiny USB-C→USB converter if needed).
- Portable Power Bank (yep, again!) — Nothing kills the magic like a dead camera in the middle of a once-in-a-lifetime view.
🛡️ Safe & Sound: Guarding Yourself & Your Gear
As a woman who often travels alone, keeping myself and my belongings safe is always top of mind. After all, there’s safety in numbers — and when you’re solo, you don’t have anyone watching your back. These are a few of the tools (and habits) that give me peace of mind and help deter theft of my most important items:
- Anti-Theft Day Bag or Crossbody — Look for lockable zippers, slash-resistant straps, and hidden compartments. Even a regular bag can be upgraded with little theft-deterrent tools.
- Zipper Locks/Clips — I use these double carabiner zipper clips to keep my bag closed — makes it much harder for sneaky fingers to get in without me noticing.
- RFID Protection — My DEFWAY travel wallet is RFID-blocking, but you can also slip an RFID card into any wallet to protect against digital skimming.
- Locking Carabiners — Locking D-ring carabiners let me clip my bag to a chair, luggage rack, or even to itself, so it can’t be separated from me without effort.
- Portable Door Lock / Alarm — A small wedge or lock you place inside your hotel or Airbnb door for extra security.
- Money Belt or Neck Wallet — Not glamorous, but great for backups: keep an extra card, a copy of your passport, and some cash hidden on your body.
- Personal Safety Alarm — A tiny device that clips to your bag or keys and emits a shrill siren if you need to draw attention quickly.
- Luggage Locks — TSA-approved locks help deter opportunistic theft when your bag is out of sight.
🕵️ Safety Habits I Rely On
Gear is only part of the equation — these little practices go a long way too:
- Keep valuables close in crowded areas (bag in front, not behind).
- Use the hotel safe (when it seems reliable) for passports, extra cards, and cash.
- Stay aware in transit hubs (airports, train stations, bus terminals).
- Don’t get lost in your phone while walking — it dulls awareness and signals easy target.
- If you’re mugged, don’t fight. Hand it over. I knew someone who broke his hand and lost his wallet anyway — not worth it.
- Back up your documents. Photograph your passport, ID, and cards; email copies to yourself and a trusted contact along with your detailed itinerary.
- Blend in when possible — skip flashy jewelry and obvious “tourist” behavior.
- Trust your gut. If something feels off, remove yourself.
📑 The Packing List You Might Actually Use
Even the most seasoned traveler (hi, it’s me 👋) forgets something ridiculous once in a while. That’s why I always keep a master packing list — part sanity-saver, part security blanket.
To make your life easier, I’ve put together a printable PDF Packing List you can download and check off as you go. It’s split into:
- Clothing (including those layers and color schemes we talked about)
- Toiletries (travel-sized, solid, or tablet form)
- Health & Safety (first aid, meds, travel locks, etc.)
- Electronics & Adapters (power banks, converters, and cord tamers)
- Day-to-Day Essentials (bags, bottles, towels, and those weird-but-brilliant tools)
- Documents (passport, visas, copies, itineraries)
- Snacks (the most important category, obviously)
👉 Grab your PDF Packing List here and pack like a pro — or at least like a semi-professional over-thinker who’s made every mistake in the book already.
Want to see my favorite gear in action? Explore my Amazon Travel Essentials.
The Last Zip
At the end of the day, packing isn’t about fitting everything — it’s about fitting the right things. The best-packed bag is one that makes your trip lighter, easier, and more fun, so you’re free to focus on the adventure instead of the clutter.
And don’t forget your carry-on — it’s not just a bag, it’s your lifeline on long-haul flights. I’ve got a full breakdown of what to pack for the plane ride over in the Epic Travel Page — check it out before you zip up for good.
So weigh it, cube it, zip it, and then let it go. Your suitcase is ready. You’re ready. Now all that’s left is to wander on.
Ready to Wander On?
Epic adventures don’t happen by accident — they start with the right prep, the right gear, and a little inspiration. Keep exploring here:
🧳 The Complete Epic Travel Guide: Everything You Need to Know for Once-in-a-Lifetime Adventures
🌍 Sobriety Stuff: Fearless Stories, Powerful Resources, and Travel Advice
🛒 All the Travel Essentials I Own and Love
Set yourself up for smoother travels, smarter packing, and epic memories. Wherever you go, wander on. 🌟
Leave a Reply