An Epic Travel Guide: Everything You Need to Know for Once-in-a-Lifetime Adventures (2025)
Planning an epic adventure can feel overwhelming — there are so many moving parts, and the stakes feel sky-high. This guide breaks it down into manageable steps so you can focus on the magic, not the mayhem.
Quick Navigation
🌍 Welcome to the Jungle (Start Here)
📦 Packing Particulars: Your Suitcase Strategy
🧳 Suitcases & the Tools That Tame Them
🧴 From Toothbrush to Toner: Toiletry Tactics
⛑️ First Aid: Preparing for Predictable Problems
🎒 Everyday Travel Essentials That Can Make or Break
⚡ Charged & Ready: Electronics & Adapters
📸 Capturing the Magic on Camera
🛡️ Safe & Sound: Guarding Yourself & Your Gear
📑 The Packing List You Might Actually Use
📜 Paperwork & Planning: Necessary Nonsense to Keep You Moving
🛂 Border Basics: Visas & Entry Rules
🧾 Protecting Your Trip: Travel Insurance 101
🛡️ Personal Safety Smarts: Habits That Travel With You
📦 Send It Ahead: Bag Shipping Services
📁 Organizing Docs & Itineraries Like a Pro
💰 Cash, Cards & Currency Exchange Tips
🚨 Break Glass in Case of Emergency: Info to Gather Ahead of Time
✨ Beyond the Stars ✨
🌍 Welcome to the Jungle (Start Here)
Epic, once-in-a-lifetime adventures are the stuff of daydreams — gorilla trekking in Rwanda, safaris across Tanzania, hot air balloons over Cappadocia. But making them happen takes more than just flights and hotels. These kinds of trips demand extra layers of planning, protection, and preparation so you can actually enjoy the magic once you’re there.
This guide is my master playbook: everything I’ve learned (and am still learning, mostly the hard way) about how to stay safe, comfortable, and joyful on the road for weeks at a time. Think of it as your travel buddy with a checklist obsession — part inspiration, part logistics, and all about making sure your dream trip doesn’t turn into a meltdown.
✨ Follow Along in Real Time
I’ll be putting all of this into practice on my own 30-day adventure through Rwanda, Tanzania, and Turkey — and sharing the chaos, the joy, and probably a few travel meltdowns along the way.
👉 Come keep me company on Instagram, TikTok, Facebook, or YouTube — it’s where you’ll see the messy, hilarious, behind-the-scenes version of what you’re reading here.
(How many times will I cry? Will I poop my pants again? You’ll never know if you don’t follow along!)
⚠️ Quick Notes Before We Begin
Amazon Associate Disclaimer: As an Amazon Associate I earn from qualifying purchases. If you click through the links in this guide, I may earn a small commission at no extra cost to you — which helps keep The Sober Globetrotter flying. ✈️
Health Disclaimer: I’m not a doctor, and nothing here is medical advice. Always consult a medical professional about vaccines, medications, or health decisions before you travel.
🚑 Health & Safety Preparations
Before you even pack your first pair of socks, taking care of your health is the single best investment you can make in a safe, comfortable trip.
💉 Travel Vaccines: Navigating the Chaos
Vaccines aren’t the glamorous part of trip planning — but they’re the difference between an epic adventure and a trip ruined by something preventable. And here’s the part no one warns you about: actually getting them is not always simple, and it often takes longer (and costs more) than you expect.
Here are the main routes you can take:
- Primary Care Provider – Start here if you can. They’ll usually handle the basics (tetanus, Hep A, maybe typhoid) and give referrals for anything they don’t stock.
- Specialized Travel Clinics – These are fantastic if you want a one-stop shop. They carry harder-to-find vaccines (like yellow fever) and stay up-to-date on requirements. Passport Health has locations across the U.S. and can usually get you in quickly — but be prepared, their convenience comes with a higher price tag, and they will not submit anything to your health insurance company.
- Budget Tip – Use GoodRX to compare prices on vaccines in your area. Once you know what the CDC recommends for your destination, you can often save a ton by piecing vaccines together from different providers.
💡 Important Lesson Learned: You usually can’t “mix and match” clinics. In other words, the provider who does your travel health consultation will also be the one who administers your shots. You can’t just have a consultation at one clinic and then take the prescription elsewhere — so choose your provider with both availability and cost in mind.
🕒 Timing is Everything
- 2–3 months before departure – ideal. Lets you schedule, order specialty vaccines, and spread out multi-dose series.
- Plan for 1–2 weeks just to get that first appointment booked.
- At least 3 weeks before travel – your minimum buffer so vaccines have time to take effect.
- But don’t panic if you’re late. Even a last-minute jab offers more protection than skipping it altogether.
📎 Pro Tip
Keep your vaccine card tucked in with your passport. For countries that require proof (yellow fever, for example), it’s literally your ticket in. And even when it’s not required, it’s smart documentation to have.
🐝 Bite Back: Keeping the Bugs Away
One of the biggest dangers in jungle countries with lower vaccine rates (and thus less herd immunity) is the bugs. These little vampires basically become carriers of whatever illness one victim suffers, then spread it to the next animal — or person — they bite. And as someone who gets about 342 bug bites to the average person’s one, this is deeply alarming to me!
The goal isn’t to panic — it’s to layer your defenses. No single product is perfect, but together they’ll keep you safe and itch-free.
Repellents: DEET has long been considered the gold standard, but it now comes with growing concerns about long-term safety, including cancer links. If you want to play it safer, picaridin (the active ingredient in Ranger Ready Repellent) is nearly as effective, far less smelly, and much gentler on skin and clothing. Either way, think of repellent like sunscreen: reapply regularly, especially if you’re sweating or swimming.
Permethrin: This miracle-worker is for your clothes and gear, not your skin. Spray or soak clothing, hats, socks, and even your backpack with this Sawyer Product before you travel. Once it’s dry, it’s odorless and keeps working for at least 40 days or 5 washes.But be careful — permethrin is poisonous before it dries. Always apply it outdoors, wearing gloves and a mask if you can, and let items dry completely before packing.
Essential Oils & Natural Options: If you prefer an au naturel route, or just want extra backup, these citronella or essential-oil-infused bug bracelets can add another layer of defense. They’re not as reliable as chemical repellents, but they can help, especially in lower-risk areas or when you don’t want to douse yourself in spray.
Nets & Barriers: In some destinations, you’ll want to sleep under a mosquito net. Packable nets are light and cheap — but double-check whether your accommodations already provide them.
Cover Up & Skip Strong Scents: Lightweight, light-colored clothing does double duty: it makes you less attractive to mosquitoes and keeps you cooler in the sun. Skip dark colors, and skip strong perfumes or lotions too — they attract bugs and even drive away the fun wildlife you actually want to see.
If You Still Get Bit: Even with all the precautions in the world, some little vampire will still find you. Pack After-Bite, a soothing anti-itch cream, or antihistamine tablets for quick relief — because nothing ruins a sunrise safari faster than scratching yourself raw.
You don’t have to turn into a walking can of chemicals. A few smart steps — treated clothes, solid repellent, a net, and maybe a bug bracelet or two — will keep you safe and let you focus on the adventure, not the itching.
💩 Tummy Troubles: The Importance of Poop
Nothing ruins an adventure faster than stomach drama. I learned this the hard way in Cuba, when I literally pooped my pants in an airport — you can read the full chaos in my Cuba travel story. Traveler’s Tummy (AKA Montezuma’s Revenge, or Delhi Belly, or plain old Traveler’s Diarrhea), is practically a rite of passage, but it doesn’t have to wreck your whole trip.
🥭 Prevention
The #1 lesson I’ve learned: it’s more complicated than just “don’t drink the water.” Local water may carry pathogens, or just a totally different mix of microorganisms than your gut is used to. Either way, the result is the same — trouble.
- Skip the tap water completely. Don’t drink it, don’t brush your teeth with it, and try not to get it in your nose, eyes, or mouth when you shower.
- Beware of hidden water sources. Produce that’s been rinsed, fields irrigated with local water, ice cubes, and even the tops of soda cans or beer bottles can all be culprits.
- Safe foods: Anything cooked through and served piping hot. Fruit you peel yourself (bananas, oranges). Freshly cracked coconuts or melons.
- Unsafe foods: Uncooked produce (especially lettuce), unpeeled fruit, raw berries, anything washed but not cooked.
- Supplements: Travelan is one you’ll hear about often at Travel Health Clinics. It introduces e. coli antibodies into your gut before meals to neutralize potential contamination. I don’t take it all the time, but if I’m knowingly rolling the dice on street food, I’ll pop one as a safety net.
- Gear up:
- Reusable straw – so your lips never touch a questionable can or bottle top.
- Hand sanitizer – I normally avoid it, but when traveling I make an exception.
- Travel soap sheets – tiny, packable, and a lifesaver in under-equipped facilities.
- LifeStraw Filtered water bottle (or Travel Straw) – lets you safely drink from questionable taps, hotel sinks, or refill stations when bottled water isn’t an option.
- 📎 Pro Tip: Sanitize your bottle regularly – especially the straw or mouthpiece. A quick wipe with sanitizer or soap keeps it from becoming its own germ farm.
🚑 Recovery
Even the most cautious traveler gets hit sometimes. The key is to pack a little gut-support kit so a bad day doesn’t turn into a ruined trip.
- Probiotics – Start before you leave and keep taking them while traveling. Go shelf-stable so you don’t need a fridge.
- Electrolyte packets – My #1 must-pack. They make bottled water safer and help you recover faster.
- Rehydration salts – Different from electrolytes; these are for when you’re already sick and need fast fluid replacement.
- Anti-diarrheal meds (Imodium/loperamide) – Perfect for when you must stop things quickly (like long bus rides or border crossings). Don’t overuse, but don’t be afraid of them either.
- Pepto Bismol – Great for calming stomach upset, nausea, and mild diarrhea before it spirals out of control.
- DiaResQ – Another product clinics recommend, technically a “Food for Special Dietary Use.” It uses bovine colostrum to help restore normal intestinal function. I haven’t tried it yet myself, but it’s on my list to pack for the future.
- Antibiotics – Some doctors will prescribe a just-in-case course for traveler’s diarrhea. Worth asking about at your travel health consultation.
- Hand wipes/sanitizer – Not just prevention; they keep you from re-infecting yourself after you’ve been sick.
🧻 My Takeaway
Don’t skip the adventure food — that’s half the joy of travel. Just pack smart, eat wisely, and have your gut-friendly toolkit ready. That way, a bad tummy day stays just that: one day, not your whole story.
☀️ Sun Protection & Recovery: Avoiding the Lobster Look
Generally, jungly zones tend to hover near the equator — which means no matter the season, the sun is intense. Sun protection isn’t just slapping on the strongest sunscreen you can find in the morning and calling it good. It’s about daily habits, evening recovery routines, and having a plan for the worst-case scenario (aka tomato face).
As an ADD Monkey Brain traveler, I’ve had my fair share of burns — they’re miserable. Luckily, I grew up in a family of doctors, so the “how to prevent and treat sun damage” lecture has been drilled into me since birth… even if I sometimes forget to follow it.
Quick disclaimer: I’m not a doctor. This is not medical advice. Talk to your own provider about OTC meds or treatments — I’m just sharing what’s worked for me.
🧴 Protection & Prevention
- Chemical vs. Physical Sunscreen – Chemical formulas are easier to apply, less greasy, and leave no white cast, but can irritate skin and harm marine life. Mineral sunscreens (zinc/titanium) are reef-safe and better for sensitive skin but need reapplication more often. My rule: use whichever you’ll apply consistently on land, and go mineral in the sea.
- SPF Considerations – Anything broad spectrum SPF 30–50 does the job. SPF 100 sounds sexy, but it’s only about 1% more effective than SPF 50.
- Side Note: UVA = aging, UVB = burning. Broad spectrum = both.
- Application Tips:
- Apply 15 minutes before exposure and reapply every 2 hours (real talk: I re-do face/neck/shoulders, but the full-body thing only happens if Mom nags me or my skin feels hot).
- SPF facial mists are a great way to refresh on the go.
- Be generous — sunscreen doesn’t work if you don’t use enough.
- Apply butt naked to avoid those weird swimsuit-edge burns.
- With sprays, rub it in to avoid white-stripe zebra burns.
- Clothing as Armor: Hats with broad brims, UPF-rated shirts, and polarized sunglasses are worth their weight in gold. (See more in the clothing section below.)
- Don’t Forget Your Lips: Grab a lip balm with SPF, or rub a little sunscreen on them.
- Clouds & Shade Lie: Shade and overcast skies don’t block UV. Even jungle canopy days still include exposure walking to and from.
💆 Routine Skin Care for Repair
- Leave Retinol Behind: It makes skin more sun-sensitive, so not the best companion when your main goal is sun defense.
- Focus on Repairing & Nourishing Instead: Ingredients that hydrate (hyaluronic acid, ceramides, squalane), soothe (niacinamide, aloe, chamomile, tiger grass), or protect (vitamin C, E, resveratrol) are your friends.
- Skip Harsh Exfoliants: Avoid abrasive scrubs and peels. A gentle silicone face brush is all you need.
- Body Care: Even if you hate slathering moisturizer in humid climates, a light body lotion with hydrating/soothing ingredients can save you if you slip up.
- Pamper Yourself: Pack a small face mask with nourishing ingredients and have a little hotel-room spa night.
🌡️ Recovering from Sun-tastrophes
Step 1 – Cool Off: Take a cool shower to pull heat from your skin, then air dry in front of a fan.
Step 2 – Internal Relief: If approved by your doctor, an anti-inflammatory pain reliever plus extra water/electrolytes helps your body fight back.
Step 3 – External Relief:
- Look for aloe vera, shea/cocoa butters, hydrating oils, and antioxidants (vitamin E, hyaluronic acid).
- Sprays are gentler on tender skin; products with lidocaine can ease pain.
Step 4 – Double Down: Don’t hide indoors the rest of the trip, but do layer up — long sleeves, pants, and the most unflattering UPF hat you can find. Add sunscreen even under clothing if you’ll be outside long.
Optional Helpers: A cooling towel or portable fan can make hot recovery days bearable.
For bite-sized tips on staying safe and healthy, head to my Travel Tips.
👕 Clothing Concerns
Clothes are the trickiest part of any epic trip — too little and you’re miserable, too much and you’re dragging a ball and chain through airports. The secret? Layers, color schemes, and a little strategy, so you can look pulled together while still living out of a suitcase.
👗 Climate & Culture: Dressing for Comfort & Confidence
The first thing to think about when packing for an epic adventure? The climate. You don’t need rain gear in the desert, and you can leave the UPF clothing at home in Iceland. Flip those scenarios, though, and you’ll regret it fast.
One easy way to start: do a quick search like “What is the climate in [PLACE] during [MONTH]?” Elevation, humidity, and seasonal quirks can make a huge difference. Unless you enjoy buying a winter hat in Alaska in July, check the actual averages before you go.
The next piece is culture. While tourists usually get a little grace, being respectful goes a long way. And some places don’t just suggest — they require. Religious sites around the world often ask for covered shoulders and knees, and many Eastern countries lean toward looser, more modest clothing overall. A little research (“cultural considerations for travelers in [DESTINATION]”) can help you feel both respectful and comfortable.
Finally, think about your activities and dining.
- On safari, I won’t need a ball gown or 5-inch heels.
- In Istanbul, though, I’ll still be walking all day and may want something a bit nicer for dinner — so I’m packing a simple dress and a pair of comfy-but-dressy sandals.
- My MVP travel item? A pashmina wrap. It doubles as an airplane blanket, a scarf, a modesty cover for temples, an extra layer on a chilly night, or even a dress-up wrap. Mine feels like cashmere but is eco-friendly bamboo (and doesn’t break the bank).
👟 Shoes: The Most Important Thing You’ll Pack
No matter where you’re going or what your exact plans are, if you’re heading out on an epic adventure you’ll almost certainly be on your feet. A lot. In Tokyo, I saw 20,000+ steps a day on a regular basis — and that wasn’t even “adventure travel,” just city wandering!
Your shoes can make or break a trip. Bad ones can wreck your body, tank your mood, and even keep you from doing activities you planned. Some excursions require closed-toe shoes, others need water-safe sandals. In the Azores, I swam in a hot spring in the ocean — amazing, but slippery and rocky. My KEEN Women’s Whisper Adventure Sandals kept my feet supported, my toes protected, and let me scramble around on the sharp, wet rocks without landing myself in the emergency room.
But here’s the rule travelers often ignore: never bring brand-new shoes on a trip.
New shoes are stiff, rub in weird spots, and haven’t yet molded to your feet. They might look cute at home or work fine for short walks, but on mile three they can become unbearable. Trust me — I’ve made this mistake more than once, and ended up buying “emergency walking shoes” mid-trip. It’s a brutal way to learn what does (and doesn’t) work for your feet after 20,000 steps.
These days, I pack a shoe capsule that covers every situation without weighing me down:
- Slip-on sneakers (Kizik Milan) – Hands-free, arch-supporting, and cute enough for city wandering. I love these for airports and plane days.
- Waterproof sneakers (On Cloud 6) – Super lightweight, comfy for all-day walking or hiking, and waterproof. Tromp through puddles with glee and impunity.
- Adventure sandals (KEEN Whisper) – Closed-toe, supportive, and grippy for waterfalls, hot springs, or rocky beaches.
- Flip-flops (REEF Cushion Breeze) – Shockingly comfy with padded straps and thick soles. Best for end-of-day wandering or beach downtime.
- Dress-up sandals (Skechers Reggae Slim or VJH Rhinestone Flats) – Cute, supportive, and evening-appropriate for city dinners when I don’t want to wreck my feet in heels.
- Dressy Flats (Vionic Uptown Ballet Flat) – When you’re heading to Le Bernadin in NYC for lunch in February, you need something that’s dressy, wintery, and will support your mad dash through the unfamiliar subways – and these will be your saviors!
Bottom line:
- Test-drive your shoes before packing.
- Bring at least two solid pairs (more if your itinerary demands it).
- Always choose comfort > cute. Your Instagram can handle clunky sneakers. Your body will thank you later.
🐱 When You Go Wild: Heat, Cold, Bugs, & Sun
When you’re heading into the wild, three concerns rule the day: heat, sun, and bugs. Are you sensing a theme here? Yep — HEAT, SUN, BUGS. The ultimate “wild” outfit won’t shock you: think Crocodile Dundee meets park ranger.
- Breathable, lightweight, UPF-rated clothing that covers most of your skin
- A wide-brimmed hat (bonus points if it’s UPF, too)
- Sturdy, waterproof shoes + thick socks you can tuck pants into
- Dark sunglasses (not just fashion — your eye health matters!)
Is it the chicest look? Maybe not. Personally, I’ve never loved khaki. But when I’m trekking for gorillas or dodging mosquitoes, comfort and health always win out over fashion.
🌴 Hot & Wild Essentials
- Long-sleeved UPF hoodie – Keeps tender skin safe without roasting you alive.
- UPF hat with brim – Skip the floppy fashion hats; you need visibility and protection here.
- Layer smart – Mornings can be chilly, afternoons scorching. Layers let you adapt to both temperature and sun.
- Skip black/navy – Dark colors = heat magnets + bug bait.
- Shoes – Never bring brand new ones (see shoe section above). Broken-in = blister-free.
- Evening flip-flops – After a day in boots, your feet will beg for a break. Go ergonomic with REEF Cushion Breeze or similar supportive flips to help your tootsies recover!
- Day bag – Hands free for lion selfies or catching yourself on “hidden” roots. Look for a lightweight, waterproof backpack or sling bag.
- Leg gaiters (Frelaxy High-Performance) – These were specifically recommended by our gorilla trek guides. Waterproof, adjustable, and they’ll keep the jungle out of your socks.
A Note on Bug-Repelling Clothes
Yes, you can buy clothes pre-treated with insect repellent. My mom even bought a pair once. But in my opinion, it’s better (and cheaper) to treat your own clothes with permethrin spray before leaving home. Just do it safely — outside, with gloves and a mask — and let it dry completely before packing. One treatment lasts about 40 days or 5 washes.
☃️ Cold & Wild
(more details coming soon)
Not every epic adventure is hot and jungly. Think Patagonia, Iceland, or high-altitude treks. Here, the rules flip — it’s all about layers for warmth, wind protection, and moisture control. I’ll be filling out this section later on, after I learn what’s good (the hard way, of course! Otherwise would I even be me??)
🎨 Color Schemes & Rewearable Layers
Packing for an epic, multi-week journey across different climates is less about fashion trends and more about strategy. My two golden rules?
- Layers are everything. They keep you prepared for anything: chilly morning safari rides, hot midday treks, breezy dinners under the stars.
- Stick to one complementary color scheme. Think: one neutral (or a light + dark neutral), one main color, and one or two accents. Suddenly every top works with every bottom, and you can mix-and-match endlessly.
The best part? Outer layers don’t need to be washed nearly as often as your base layers. Tanks, tees, undies, and socks are the ones you’ll churn through. If those pieces are thin and quick-dry, you can rinse them in a sink and have them ready to re-wear by morning.
🧺 Laundry on the Road: Staying Fresh When Showers are Scarce
Let’s be real: none of us own enough underwear to last a 30-day trip. The secret to staying fresh on the road is making a plan before you ever pack.
- Book smart. If you’re choosing your own stays, look for Airbnbs with laundry at strategic points — say, every 7–10 days.
- Ask ahead. On a group tour? Email the operator to find out where laundry stops are possible.
- Reuse wisely. Pants? 4–5 wears unless they get funky. Shirts? 2–3 wears if it’s not too sweaty. Activewear or quick-dry fabrics are your best friend — especially in the jungle.
- DIY laundry. Small stuff (undies, socks, tanks) can be sink-washed and hung overnight. Quick-dry fabrics = less mildew, more smiles.
My Travel Laundry Toolkit:
- A travel laundry bag (with built-in scrubbers, doubles as a dry bag )
- A tiny travel clothesline (hangs anywhere, no clothespins required)
- Bar laundry soap or sink detergent packets
These little gadgets take up almost no space but will save your sanity when you’re halfway through your trip with zero clean socks.
🧳 Packing Particulars: Your Suitcase Strategy
Packing for an epic trip is a dangerous game of Tetris: space, weight, and organization are your only allies. You want gear that multitasks, doesn’t tip the airport scale, and won’t have you tearing apart your bag in a frenzy every single stop. Here are my hard-earned lessons from years of chaotic trial and error.
🧳 Suitcases & the Tools That Tame Them
One of my key strategies is simple: multiple bags = less chaos. I almost always bring four on major trips — two checked, two carry-ons. On the first and last flights, that setup helps me spread out the weight so nothing tips over the limit. Once I’m actually traveling, the smaller checked bag holds my daily-use stuff, while the big one is for the gear I only need at specific legs of the trip.
Inside those four bags? Absolute cube-and-pouch obsession. Compression cubes for clothes (sorted either by type — shirts, pants — or by segment of the trip), and zippered pouches or reusable bags for everything else. Toiletries, electronics, makeup, first aid kits… nothing rolls loose in my luggage. And the smaller and more specific each category is, the easier it is to grab what I need without upending my suitcase.
🎯 Core Moves in My Luggage Strategy
- Security first. The last thing you want is a pickpocket grabbing your essentials. Look for travel-focused bags with anti-theft features, locks, or hidden compartments for documents and valuables.
- Rolling bag style matters. I’m firmly Team One-Side-Opens (like a trunk) over clamshell. It takes up less floor space in your lodging, and allows more packing flexibility. Soft-sided bags usually do this by default, but some hard shells are catching up — and they’re my favorites.
- Pieces that work together. Assume you’ll have to move everything by yourself. Two backpacks could work, but I prefer a crossbody + backpack combo. And every carry bag should ride securely on your rollers — this cheap, handy strap keeps everything together, so I don’t have to.
- Why I carry on a roller instead of a backpack. Electronics and “can’t lose” essentials belong in your carry-on — but I don’t want all that weight digging into my shoulders while I’m slogging through airports. With a roller, the bag itself does the heavy lifting, and my personal item can sit right on top.
- Personal Item. This messenger bag or this backpack bag carries everything I’ll need during the flight itself – I love both for different reasons, so I pick the one that complements my other luggage best.
- Spacious main compartment (bonus if you can organize with mini cubes).
- Exterior pockets for quick airport access — but keep documents secure (think zippers close to your body or tucked inside the main compartment).
- Extras I love: a water bottle pocket, key clips (I live in fear of losing my house keys while abroad), sunglass slots, and the ability to double as a day bag.
- Rolling Carry-On. My holy grail bag has:
- A single main compartment that opens from one side (no clam shell).
- Hard sides to protect fragile items and electronics.
- Spinner wheels, not the old-school single-direction kind.
- A telescoping handle strong enough to hold my personal item.
- Hooks and even a cup holder — because sometimes it’s the little things.
- Large Rolling Bag. Non-negotiable: four spinner wheels. If you’ve ever tried to haul 50 lbs at a tilt, plus a bag stacked on top, you know why. I like a large compartment with a hinged lid, preferably in a hard shell.
- Smaller Checked Bag. Two rollers are manageable, three is chaos. For my second checked piece, I want something that straps to the big one but can also be carried hands-free if needed. My new favorite is this vacuum-seal expandable travel backpack — it even has a built-in pump to compress your load, plus a TSA lock and water resistance. It’s basically the next-gen version of my trusty Patagonia that lasted me a decade.
🎭Supporting Cast: The Organizers
The real secret to stress-free packing? Keeping everything contained. Cubes, pouches, and organizers make your life infinitely easier when you’re digging through bags in a hotel room at midnight. With the right setup, you’ll know exactly where everything lives — no more chaos explosions on the bed.
Here are my go-to categories (with links to my favorites):
- Compression Packing Cube Set — I don’t always compress them, but I love having the option. And when I’m bringing winter gear or sweaters, this XL Cube is perfect!
- Bucket Toiletry Bag — great for all my countertop stuff, especially if you’re sharing a small space or moving around a lot.
- Hanging Toiletry Bag — my newest find this one is much slimmer and more packable, and perfect for shower gear, paired with the bucket bag for counter stuff.
- All-in-One Toiletry Bag — when I need everything in one place.
- Reusable Ziplocks — endlessly handy for snacks, small toiletries, and random chaos.
- Stasher Bags — waterproof, tough, and great for messier items.
- Large Electronics Organizer — when I’m hauling a lot of cords, cameras, and accessories, I love something bigger, that keeps the tech tangle under control.
- Shoe Bags — these Clear Waterproof Shoe Bags keep dirty soles from messing with your clean clothes. And you never know when an extra water proof bag will come in handy!
- Cord Organizers — sometimes I just need a small fix, and these leather cord clips to keep chargers and stray cables tamed. These reusable silicone zip ties are great for larger cords, like for my laptop.
- Pill Organizers — I use this one as a two-week box by treating each AM or PM slot as one day, or if I’m going for a really long trip, this one works for a month or more and keeps my whole medicine chest in one place.
- Jewelry Storage — pill boxes work surprisingly well to wrangle necklaces and earrings, like with this compact model; or go classic with the BAGSMART Jewelry Organizer Roll.
- Laundry Bags — I like these JHX Travel Laundry Bags for corralling the dirties — lightweight, washable, and easy to separate.
- Document Organizer — a lifesaver for passports, boarding passes, and cards. My go-to is the DEFWAY Passport Holder.
🧴 From Toothbrush to Toner: Toiletry Tactics
The fastest way to save space and weight? Overhaul your toiletries. Most of what we use at home is full of water and only does one job. On the road, I switch to solid shampoo/conditioner bars, my trusty lavender goat milk soap bar, and toothpaste tablets — all tiny, packable, and water-free.
I also love multitaskers. For example, my Bioré UV Aqua Rich Daily Hydrating Moisturizer with SPF 50 does double duty as sunscreen and face lotion. Cutting down on liquids and doubling up on uses saves me serious space (and saves me from cleaning shampoo explosions in my bag).
This is one of my favorite areas to trim the fat when I’m packing, so I put together a whole guide to my travel-friendly products — you can check out the full list here.
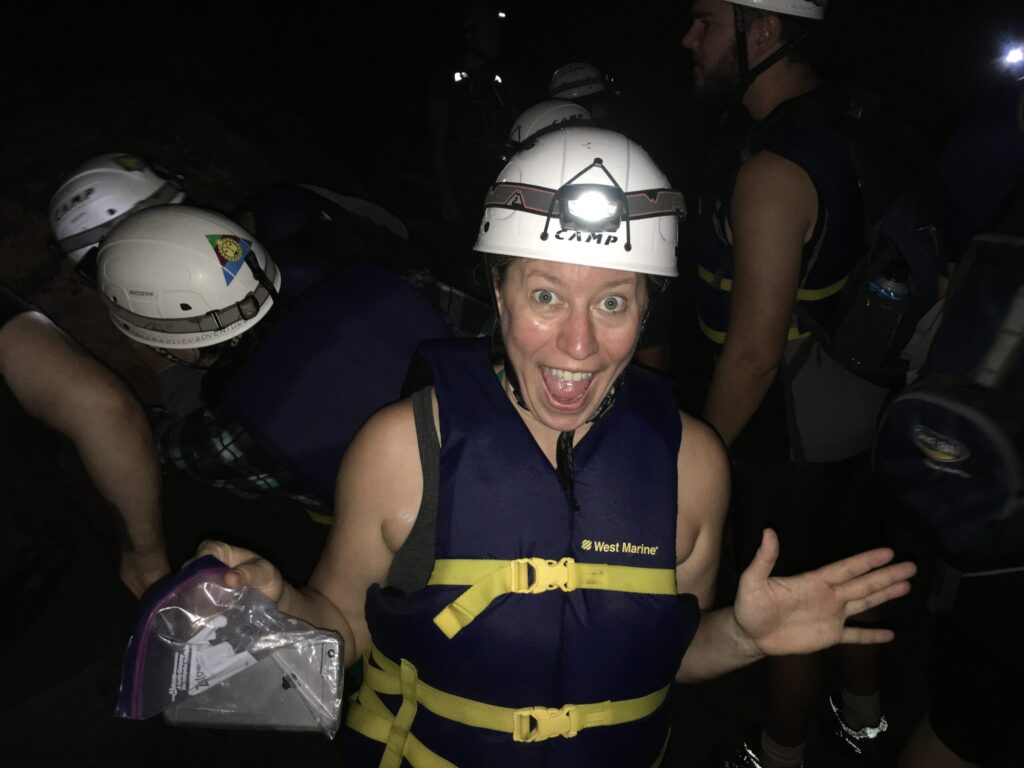
⛑️ First Aid: Preparing for Predictable Problems
You don’t need to prepare for major emergencies (if a gorilla rips off my arm or I tumble down a mountain, trust me — I’ll need a doctor, not a Band-Aid). But you do want to be ready for the minor aches and pains that come with long days of travel: headaches, scrapes, sunburns, and upset tummies.
The goal: cover the basics without weighing yourself down (or spiraling into panic over worst-case scenarios). This is not medical advice — just my personal kit based on experience, and all over-the-counter.
Here’s what I carry:
- Pain reliever / anti-inflammatory (ibuprofen or similar)
- Antihistamine (allergy relief)
- Antacid tablets (like Tums)
- Anti-diarrheal pills (Imodium)
- Anti-constipation remedies (laxative, fiber pills, or magnesium)
- Stomach soother (Pepto-Bismol tablets)
- Rehydrator (Pedialyte powder packs)
- Itchy solutions (cortisone cream, After Bite stick)
- Burn soothers (aloe, Aquaphor)
- Blister patches / moleskin
- Adhesive bandages — regular, finger, and XL cloth
- Antiseptic (hand sanitizer or alcohol wipes)
- Antibiotic ointment (Neosporin)
- Tweezers (for splinters, ticks, cactus spines — ask me how I know)
- Traveler’s diarrhea kit: electrolyte powders or tablets, plus Travelan and DiaResQ
🎒 Everyday Travel Essentials That Can Make or Break
When you’re out exploring, you’ll need more than just your wallet and phone. These are the items I never leave behind — and the specific versions I love to bring along:
- Day Pack — I’m a crossbody fan for easy access and security. One roomy compartment plus smaller pouches keeps me organized. I rotate between this sling backpack for active days or shorter treks, this backpack when I’m headed into nature for the day, and this day bag with a ton of security features for city adventures.
- Water Bottle — I own approximately 57 bottles, but when traveling I narrow it down:
- Large: Durable, insulated, and with a hook/handle so I can clip it outside my pack. Perfect for treks. (My favorite carabiners make this easy.)
- Small: Lightweight, slips in a bag, and easy to refill in cities — saves your back from lugging around a giant jug.
- Bonus: A LifeStraw or bottle with built-in filtration for those “hmm, is this safe to drink?” moments.
- Rain Gear — Either a packable rain jacket or a compact umbrella.
- Waterproof Phone Pouch — Essential for waterfall hikes, boat rides, or anywhere your phone might take a dip.
- Travel Towel — Small and fast-drying, but versatile enough for picnics, extra layers, or emergency spills.
- Dry Bag — If your pack isn’t waterproof, this keeps electronics and sensitive items safe. Bonus: doubles as an organizer when it’s not protecting from splashes. And this one is super light and folds down reeeeeal small until you need it!
- Random-but-Brilliant Tools — Sometimes it’s the weird little things that save the day. I always toss in a few MVPs: carabiners, safety pins, clothes pins, hair ties, super glue, a travel clothesline or bungee cord, and even a pillowcase. I also keep a few tiny extras on hand: a mini flashlight, a pocket roll of duct tape, zip ties, and a sleep mask with earplugs. You won’t always know what you’ll use them for — but you’ll be very glad you packed them.
- PRO TIP: The 5 Things I Always Pack — No matter the destination: swimsuit, waterproof phone case, hat (shady for summer, warm for winter – or both for the crazy trips), flip flops, and fiber pills. Small, lightweight, and absolute lifesavers. Forget one, regret it later.
⚡ Charged & Ready: Electronics & Adapter
Travel is hard enough without a dead phone, and hotel outlets are a cruel joke. Between your phone, earbuds, watch, Kindle, and camera, you’ll be fighting for plugs unless you bring your own setup. Here are all my strategies and top picks so you can stay powered up — without blowing a fuse in your brain.
- Universal Travel Adapter — One solid adapter with multiple plug types = peace of mind. Skip the cheap ones; look for sturdy, grounded versions that won’t fall apart after a week.
- Voltage Converter (if you need it) — Essential if you’re bringing heat tools (hair dryers, straighteners) from the US. Most modern electronics (phones, laptops, cameras) already handle 110–220V, so check your devices first.
- All-in-One Device — Or, do it all with one powerhouse: a charging station that includes multiple USB/USB-C ports, standard plug slots, and built-in international adapters, voltage conversion, and surge protection. It’s a lifesaver in places where power surges are common (looking at you, Southeast Asia). But make sure you check your specific country’s plug type – there are some extremely specific ones out there (ahem, Africa!).
- Charging Station / Power Strip — If you’re not going all-in-one, bring a compact power strip with multiple ports and a long cord for awkward hotel layouts. Add a couple of 3-to-2 prong adapters for older outlets.
- Portable Power Banks — I like having two: a slim, lightweight bank for daily carry, and a bigger backup that can recharge my phone and camera several times over.
- Pro Tip: In countries with less stable electricity (hello, power surges!), charge your phone through your power bank instead of directly from the wall. If a surge fries anything, better a $30 charger than your $1,000 phone. In Thailand, my block kept everything topped up for days without a hiccup.
- Cables & Cord Management — Pack extras (because you will leave one behind in a hotel wall). I use my electronics organizer to keep chargers, cords, SD cards, and adapters from becoming a spaghetti monster.
- Optional Extras — Kindle (I might dies without mine), laptop/tablet if you’ll actually use it, and noise-canceling headphones if you value your sanity on long flights.
- PRO TIP – make sure every single electronic device and charger block is fully charged before leaving home.
📸 Capturing the Magic on Camera
When you’re heading out into the great wide world to see and do things you’ve never experienced before, you’ll probably want to bring some of those memories home with you. In my opinion, photos are the best souvenirs — I’m even turning my house into a personal gallery of my adventures.
Most of the time, your smartphone will be your best tool. The cameras today are superb, and unless you need super-fast shutter speed or want to capture something far away (like animals on safari or architectural details at the top of a cathedral), you don’t need to lug a full DSLR.
Most of the time, your smartphone will be your best tool. The cameras today are superb, and unless you need super-fast shutter speed or want to capture something far away (like animals on safari or architectural details at the top of a cathedral), you don’t need to lug a full DSLR.
If you are looking to get into a more serious photography hobby, I recommend the Canon Rebel T7. It’s simple enough for beginners to learn quickly, but powerful enough to deliver that satisfying step up in quality and control. The bundle I started with includes the camera plus all the basics — extra battery, lenses, tripod, and accessories — everything you need to get going without endless add-ons. And if you want a little extra help learning the buttons and dials, this Canon EOS Rebel T7 Pocket Guide is a great reference to have in your bag.
That being said, a few accessories (and a couple of stand-alone gadgets) can level up your phone photography big-time:
- Selfie Stick / Mini Tripod — Because my mom is the world’s worst photographer, and I’d rather have control over my own angles. Great for solos, group shots, or just avoiding 87 blurry photos of your chin. Bonus if it doubles as a Bluetooth remote (like the one linked).
- Portable Ring Light / Clip-On Light — Great for low-light selfies, food shots, or evening street scenes.
- Lens Attachments — Clip-on wide-angle or macro lenses can add new dimensions without upgrading your whole setup.
- Mini Body Cam — This wearable thumb-sized body cam is a cool middle ground between your phone and a GoPro. At around $60, it’s way cheaper than a full action cam, and super easy to use for hands-free video.
- Mini Action Cam — For water, sports, or anything where you want to be hands free and get shots you can’t with your phone (sky diving or snorkeling shots anyone?). I like this version by DJI – it’s higher rated and less expensive than the name brand GoPro. Add on this accessories kit and you can strap that sucker to almost any part of your body or any surface you choose!
- Extra Memory Cards / Storage — And if you need to offload quickly, this USB-C card reader/adapter connects SD or microSD cards straight to your phone or laptop (with a tiny USB-C→USB converter if needed).
- Portable Power Bank (yep, again!) — Nothing kills the magic like a dead camera in the middle of a once-in-a-lifetime view.
🛡️ Safe & Sound: Guarding Yourself & Your Gear
As a woman who often travels alone, keeping myself and my belongings safe is always top of mind. After all, there’s safety in numbers — and when you’re solo, you don’t have anyone watching your back. These are a few of the tools (and habits) that give me peace of mind and help deter theft of my most important items:
- Anti-Theft Day Bag or Crossbody — Look for lockable zippers, slash-resistant straps, and hidden compartments. Even a regular bag can be upgraded with little theft-deterrent tools.
- Zipper Locks/Clips — I use these double carabiner zipper clips to keep my bag closed — makes it much harder for sneaky fingers to get in without me noticing.
- RFID Protection — My DEFWAY travel wallet is RFID-blocking, but you can also slip an RFID card into any wallet to protect against digital skimming.
- Locking Carabiners — Locking D-ring carabiners let me clip my bag to a chair, luggage rack, or even to itself, so it can’t be separated from me without effort.
- Portable Door Lock / Alarm — A small wedge or lock you place inside your hotel or Airbnb door for extra security.
- Money Belt or Neck Wallet — Not glamorous, but great for backups: keep an extra card, a copy of your passport, and some cash hidden on your body.
- Personal Safety Alarm — A tiny device that clips to your bag or keys and emits a shrill siren if you need to draw attention quickly.
- Luggage Locks — TSA-approved locks help deter opportunistic theft when your bag is out of sight.
🕵️ Safety Habits I Rely On
Gear is only part of the equation — these little practices go a long way too:
- Keep valuables close in crowded areas (bag in front, not behind).
- Use the hotel safe (when it seems reliable) for passports, extra cards, and cash.
- Stay aware in transit hubs (airports, train stations, bus terminals).
- Don’t get lost in your phone while walking — it dulls awareness and signals easy target.
- If you’re mugged, don’t fight. Hand it over. I knew someone who broke his hand and lost his wallet anyway — not worth it.
- Back up your documents. Photograph your passport, ID, and cards; email copies to yourself and a trusted contact along with your detailed itinerary.
- Blend in when possible — skip flashy jewelry and obvious “tourist” behavior.
- Trust your gut. If something feels off, remove yourself.
📑 The Packing List You Might Actually Use
Even the most seasoned traveler (hi, it’s me 👋) forgets something ridiculous once in a while. That’s why I always keep a master packing list — part sanity-saver, part security blanket.
To make your life easier, I’ve put together a printable PDF Packing List you can download and check off as you go. It’s split into:
- Clothing (including those layers and color schemes we talked about)
- Toiletries (travel-sized, solid, or tablet form)
- Health & Safety (first aid, meds, travel locks, etc.)
- Electronics & Adapters (power banks, converters, and cord tamers)
- Day-to-Day Essentials (bags, bottles, towels, and those weird-but-brilliant tools)
- Documents (passport, visas, copies, itineraries)
- Snacks (the most important category, obviously)
👉 Grab your PDF Packing List here and pack like a pro — or at least like a semi-professional over-thinker who’s made every mistake in the book already. COMING SOON – I’M WORKING ON IT!
Want to see my favorite gear in action? Explore my Amazon Travel Essentials.
✈️ Surviving the Long Haul Travel
When you’re staring down 20+ hours of travel, a little strategy turns a grueling ordeal into a manageable (dare I say… enjoyable?) journey.
📋 Before You Board: Setting Yourself Up for Success
When I know I’m going to be spending a full day (or two, in the case of my journey to Africa) in planes, trains, and automobiles, I start preparing well in advance. And I don’t just mean gathering documents and packing bags — I want my body as ready as possible for what’s coming.
For me, that means three main things: sleep, hydration, and gut regulation.
Sleep — I’ve got a whole section on jet lag coming later, but here’s the short version: if my first flight can be in the afternoon or evening, it helps immensely. Either way, I wake up much earlier than usual on travel day to start shifting my rhythm. A good rule: take the number of hours you’ll be changing (say, 7), divide by two, and get up at least that much earlier (so if I normally wake at 7am, I’ll be up by 3:30am). Caffeine and melatonin can also be helpful tools — before, during, or after travel — to get your body on track.
Hydration — Flying is basically being locked in a desiccation chamber. To counteract it, I start boosting water intake five days before travel and slather on extra moisturizers at the same time. On travel day, I ease back (no one wants to need the bathroom every 15 minutes) but I do a full-body hydration boost the night before: intensive moisturizer from head to toe. On the plane, I double down with a hydrating sleeping mask and dab Aquaphor on lips, cuticles, and around my eyes.
Gut Regulation — Nobody talks about poop enough. And yet… nothing derails a trip faster than digestive chaos. I’ve been on both ends of the spectrum (once so constipated I had to resort to suppositories 🤦♀️; once in Cuba, so sick I literally pooped my pants in the airport). Lesson learned. Now I come prepared:
- Hydrate + eat smart — dehydration and too much airport junk food can throw everything off faster than you think.
- Fiber supplements — start a week before travel, and add an extra dose on long-haul days.
- Magnesium — a natural, gentle supplement to help keep things moving.
- Pack both sides of the spectrum — a mild laxative and an anti-diarrheal (like Imodium) go in my carry-on, not my checked bag.
👖 Comfort First: What to Wear on Long Flights
The tricky part of dressing for 20+ hours in transit is that you need clothes that can do everything. Comfy enough to sleep in, supportive enough for a mad airport sprint, layers for temp swings, and easy-on/easy-off shoes for security checks and mid-flight bathroom runs. Bonus points if they help you sleep better during and feel better after the journey.
I’ve written a whole list of my favorite travel outfits (all shoppable on Amazon for your inspiration), but here are the key points I live by:
- Nothing Too Tight or Restrictive — I am not looking for pants that suck in my gut and leave angry red marks while I’m trying to nap. Instead, I swear by these joggers.
- Support Where It Counts — I’ve recently discovered sleeping bras, which keep things supported but free (hallelujah). A tank top with a built-in shelf bra, like this one, works too.
- Dress in Layers — Why is it always sweltering when you board and freezing when you finally fall asleep? Layers that come on and off easily are key. My go-tos: this sweatshirt, perfectly snuggly for nap time, or this fleece jacket, which also makes a great layering piece later on (wear it under a rain jacket and you’ve basically got a winter coat)
- Add a Pashmina — The ultimate multitasker. This one is my favorite: tiny to pack, endless uses throughout your travels, and doubles as an in-flight blanket.
- Double Down on Shoes — I’ve said it before and I’ll say it again: shoes make or break the day. I wear comfy, slip-on sneakers to the airport, but I always keep slides or flip flops in my bag. Trust me, you do not want to stumble to the bathroom shoeless, or wrestle with laces when you’re half asleep.
- Two Sock Options — Compression socks keep circulation flowing and help fight fatigue (and clots). But when they feel too tight, I switch to my cozy wool-blend socks.
🎒 Carry-On Packing: Your In-Flight Lifeline
A good carry-on strategy is vital, especially on long journeys with connections. I always travel with two bags:
- Personal Item → my in-flight essentials
- Rolling Carry-On → fragile items like electronics, things I might need during layovers (change of clothes, toiletries), and backups of essentials (undies, prescriptions) in case my checked bag gets delayed.
- Don’t forget some carabiners and this strap to hold everything together!
That’s the theory. Here’s the reality: my actual carry-on checklists, with links to the exact pieces I use wherever possible.
🧳 Rolling Carry-On
- Change of Clothes — at least a clean shirt + undies, ideally one full outfit
- Electronics & Fragile Items — DSLR, accessories, larger power banks, backup cords, adapters, converters (organized in this bag, or wrangled with these silicone ties); things I won’t use in flight
- Laptop + Cords — technically could go in my personal item, but experience says I never actually use it in flight (cords held together neatly with these reusable zip ties)
- Prescription Meds — about a week’s worth; bulk supply goes in my checked bag
- Travel Documents I won’t need in the airport (itinerary, guidebooks — but keep that passport handy, y’all)
- Small Toiletries + Travel Towel — if your layover airport has showers (YAY Amsterdam!)
👜 Personal Item
- Essential Documents & Wallet Organizer — passport, credit/debit cards, cash, any pre-approved visas or entry documents. Always carry paper copies as backup — phones die, WiFi fails, and sometimes a piece of paper is the only thing standing between you and being totally F’ed.
- Prescriptions (in-flight needs) — anything you’ll need to take during your journey. Keep that supply handy in these pill bags.
- Mini First Aid Kit — for in-flight aches & pains:
- Pain reliever
- Stomach soothers (Pepto, Tums)
- Bandaids
- Decongestant pill/spray
- Fiber pills + anti-diarrheal (trust me, you don’t want to learn this lesson mid-airport like I did in Cuba)
- Hand Soap Sheets; Hand Sanitizer or Sanitizing Wipes
- N95 Face Masks — The pandemic may have passed, but I take a cue from the Japanese: I wear them to dodge illness before a big trip, and they’re lifesavers in poor air quality (think wildfire smoke, sandstorms, or subway crowds).
- In-Flight Beautification Bag:
- Body Wipes for freshening up and a tube of Deodorant Cream that won’t melt, crumble, or leak.
- Face Wipes or Dissolving Cleanser Towels
- Eye Cream with caffeine
- This Hydrating Sleeping Mask — or this Superberry Dream Mask
- Day Cream with SPF for post flight
- Aquaphor
- Tooth Cleaning Kit — disposable brushes or toothbrush + toothpaste tablets (2–3), travel floss poppers, or this all-in-one travel tooth cleaning system
- Luxurious hand cream — go for a subtle, relaxing scent (like lavender)
- Dry Shampoo (non aerosol)
- Sleeping Supplies:
- Entertainment & Electronics:
- PRO TIP: before leaving home, download any books, shows, movies, podcasts, etc you think you’ll want for the whole trip. You can be sure of your own WiFi; not so much once you’re on the road.
- Kindle (or a book/magazine, old-school style) in its case
- Phone (duh), preloaded with shows/movies/podcasts
- Noise-canceling earbuds (these hook over my ears and never fall out when I’m squirming into sleep)
- Charging cords for everything (wrangled with these clips)
- Charging block
- Bluetooth Headphone Adapter (so I can use my headphones with the plane’s entertainment system)
- Notebook + pens for mid-flight inspiration
- Flip flops or slides (mid-flight bathroom runs made easy)
- Pashmina (if I’m not already wearing it)
- Refillable water bottle – large, small, or flat
- Food & Drinks Kit:
- Mini salt + pepper shaker
- Seasoning/condiment packets (crushed red pepper, sriracha, etc.)
- TSA-sized bottles of mocktail syrups/shrubs
- Dehydrated citrus powder
Packing your carry-on feels like a game of Tetris at 5am — one wrong move and suddenly your snacks are crushed and your neck pillow is MIA. To save you from in-flight chaos, I made a printable: The Carry-On Packing Checklist (PDF). It’s got all the essentials so you can stay sane at 35,000 feet.
🍎 Snacks, Sips & Supplemental Supplies
Airport food is overpriced and mediocre at best. Airplane food? Basic, bland, and limited (especially for the sober gal). But, my dear friends, this is where I shine.
While I’ll grab a hot meal during layovers, what I really don’t want to buy in an airport is another sad bag of chips or cookies. I’ve even been known to pack a whole cheese & charcuterie board in my bento lunch box (yes, accompaniments included). That might be overkill on overnight flights — nobody wants to cart around a dirty lunchbox for a month — but you get the idea.
And in-flight meals do have one excuse: your taste buds genuinely don’t work as well at high altitudes. Why airlines haven’t learned to season with this in mind is beyond me. Regardless, I come prepared!
Here’s what I’m packing for my two days of travel — a mix of snacks, flavor boosters, and DIY drink upgrades for a cleverer gastronomic experience:
Flavor Enhancers — Bland plane food doesn’t stand a chance. I bring a mini salt & pepper shaker (sometimes with a custom blend like Cajun spice), crushed red pepper, and a stash of condiment packets I’ve saved (sriracha, hoisin, mustard, hot sauce — my holy quadrinity).
Snack #1: Homemade Trail Mix — Forget sad peanuts and raisins. I build a spicy-sweet blend with protein, healthy fats, and crunch: think wasabi peas, spicy toffee peanuts, hot honey pistachios, salt & vinegar corn nuts, and dried cherries. But the fun part? Make your own with 3–5 favorites from the nut & dried fruit aisle. Aim for at least one nut, one dried fruit, and one crunch factor for optimal satisfaction.
Snack #2: Grab-and-Go Stash — Single-serve snacks (granola bars, nut packs, candy) are clutch not just on travel days but throughout the trip. I always stash a few in my day bag for hangry emergencies. Pro tip: DIY them in little reusable ziplocks you refill from a larger supply in your checked bag.
Snack #3: Something Sweet — This changes every trip, but I always look for treats that aren’t crumbly, won’t melt, and satisfy in small doses. Individually wrapped Ghirardelli minis or Lindt truffles are my go-tos — delicious, tidy, and less likely to melt into a big ol’ chocolate mess.
Drink Makers — I’m sick of soda and juice being the only options. So I pack my own kit: favorite tea + a mini honey bear, powdered lemon, and a TSA-sized bottle or two of lavender syrup or shrub. Add to sparkling water for a mean mocktail.
🛫 Layover Intel: Making the Most of Your Airport Time
It’s rare to fly straight from home to your bucket-list destination. More often, you’ll land somewhere in between — and usually for hours at a time. I don’t plan international layovers for less than four hours (too risky for missed connections), which means mine often stretch much longer.
A little advance research on your temporary airport “home” can make those hours infinitely better. Here’s what I look into:
- City Access — Is my layover long enough to sneak into the city? Is it even allowed? If so, is there luggage storage at the airport? And how much time will I need to get back through security or customs?
- Showers — Nothing makes a second long-haul flight more bearable than a rinse. On my upcoming trip, I’ve got a five-hour layover between two nine-hour flights — and Amsterdam airport has showers, so I’m packing toiletries and my travel towel in my carry-on.
- Sleeping Pods or Hotels — In some Japanese airports, you can rent capsule hotel pods for a few hours of real horizontal sleep. For really long layovers, it can even be worth booking an airport hotel, especially if it’s accessible without clearing customs.
- Food Options — Do a quick check before you go so you know where the good eats are near your terminal, instead of grabbing the first sad sandwich you see.
- Lounges — Depending on your airline, day passes are often available whether or not you’re flying business class. Not all lounges are worth it, but if you can get good food, comfy seating, showers, and a quiet vibe for about the same price you’d spend wandering the airport anyway? Totally worth it. (I’m flying Delta-KLM through Amsterdam and bought lounge access for $85 — worth every penny for nine hours of sanity.)
- Smoking Areas — Not for everyone, but I’ll admit I still smoke (for now). In Amsterdam’s airport there are no indoor smoking areas, and I don’t know if leaving/reentering will be an option with immigration. Solution: nicotine lozenges in my carry-on.
- Pampering & Shopping — Airports can be their own mini spa day if you know where to look. Massage chairs are common, and some hubs even have spas for quick treatments. And let’s not forget duty free — the only place I’ll splurge on my favorite (but pricey) Kiehl’s skincare.
💡 Hot take: I actually love airports. With a little prep, they’re a welcome respite between cramped airplane seats — a chance to stretch, recharge, and people-watch your heart out. A little recon can turn a miserable slog into a mini-adventure.
📜 Paperwork & Planning: Necessary Nonsense to Keep You Moving
The unsexy stuff — visas, insurance, money, documents — is what keeps your trip from unraveling; get this right, and you’ll thank yourself later.
🛂 Border Basics: Visas & Entry Rules
Every country plays by its own rules — and those rules change often. Don’t assume your friend’s story is the rule: just because someone breezed through without issue doesn’t mean you will. Maybe they got lucky; maybe the rules changed last month; maybe they had the right official in the right mood. Do your own research so you can make your own calls. Start with the official embassy or consulate websites, and check more than once before departure.
👉 And don’t even trust me 100%! I am definitely not done making mistakes in life, and I really like to learn lessons the hard way. Consider this your nudge to start digging deeper.
Here’s where to start your research:
- Passport Validity — Many countries require your passport to be valid for 6+ months beyond your travel dates, and some require at least 2–3 blank pages for stamps and visas. Double-check yours now, not the week before you fly.
- Visas — Some can be obtained online in minutes, others take weeks. Figure out whether you need one, how long it takes to process, and whether you can get it on arrival.
- Example 1: In Tanzania, you can get a visa upon arrival — but you’ll need cash, and if you land in the middle of the night, you might not even have access to money changers.
- Example 2: Or you can apply online, but be prepared: it may take 1–2 weeks to process, and if there are any mistakes (like the time my visa approval dates started two months after I arrived), you’ll need to reapply and wait all over again.
- Other Entry Restrictions — It’s not always about visas. Some countries require special approvals, registrations, or documentation before you arrive. If you skip these, you could be denied entry on the spot.
- Example: In Japan, many prescription medications are considered controlled substances, and you need pre-authorization to bring them in legally.
- Onward Tickets & Entry Forms — Some countries require proof of onward travel, filled-out arrival cards, or even departure forms/fees before you leave the airport.
- Special Permits — For certain activities or destinations, you’ll need extra paperwork. (Think gorilla trekking permits in Rwanda/Uganda, or passes for restricted regions in places like Bhutan or Tibet.)
✨ Bottom line: don’t trust luck, rumors, or old advice. Rules shift constantly, and the only way to avoid a panic attack at immigration is to do your homework early, thoroughly, and often.
🧾 Protecting Your Trip: Travel Insurance 101
Insurance is one of those things nobody wants to buy — until the day you really, really wish you had. This is a personal choice, but I’ll tell you what I do: I always carry travel insurance.
I use Allianz myself. Their basic policy covers a lot, and while I’ve (knock on wood) never had to use it yet, I know I’ll be glad it’s there if I do. Like… if a gorilla rips my arm off in Rwanda, I’m covered both for local care and for the medical evacuation to a real hospital.
Here’s what most plans can include:
- Medical Emergencies & Evacuation — the baseline coverage I carry.
- Trip Interruption or Cancellation — if you get sick, miss a flight, or need to go home early.
- Lost or Delayed Baggage — when your suitcase takes its own vacation without you.
- Rental Car Coverage — dents, dings, and “oops I thought that was reverse.”
- Annual vs. One-Trip Plans — if you travel once a year, grab a one-time plan; if you travel constantly (like me), an annual plan can save money and stress.
Peace of mind is priceless, and having insurance in place lets me be more adventurous — and more carefree — wherever I roam. And if the gorilla decides to beat me to death with my own arm? At least the paperwork’s covered.
🛡️ Personal Safety Smarts: Habits That Travel With You
No matter where I go, my safety is always priority numero uno. That doesn’t mean living in fear — just traveling smart and stacking the odds in your favor.
Here’s what I keep in mind:
- Check Travel Advisories — Your government’s travel advisory site will flag any major issues at your destination (political unrest, health concerns, natural disasters). Don’t ignore it.
- Make Yourself a Harder Target — Keep valuables in your front pockets, and in crowded areas wear your bag crossbody and on the front of your body. Thieves want quick, easy grabs — don’t make it easy.
- Skip the Spray — Pepper spray and other weapons are illegal in many countries (and confiscated at airports). Instead, I carry a personal alarm: small, legal, and loud enough to draw attention — and give me peace of mind.
- Stay Aware — Walk with purpose, not confusion. Don’t bury your face in your phone, especially in crowded areas. Blend in when you can — screaming “tourist” makes you a target.
- Hotel Habits — A portable door lock can add extra security, and I never announce my room number at check-in, or anywhere where others can hear.
- Document Safety — Keep digital and paper copies of your passport, ID, and key cards stored separately from the originals. I email copies to myself and a trusted contact, just in case.
- Getting Help — If you’re ever attacked, don’t just yell “Help!” into the void. Either shout “Fire!” (which draws attention fast) or call out a specific person (“You in the red shirt! Call the police!”). Research shows bystanders act when they 1) know what’s happening, 2) feel personally responsible, and 3) believe they can help.
Confidence goes a long way — even if you’re faking it. I may have no idea where I’m going, but I always walk like I’m late for something important. I’ve got enough practice at it, after all.
🔗 Looking for specific gear to help with safety on the road? Check out my packing essentials section where I list my favorite personal alarms, zipper locks, and more.
📦 Send It Ahead: Bag Shipping Services
While not available (or advisable) everywhere, baggage delivery services can be a lifesaver if you’re moving around a lot and don’t want to haul everything with you. They’re especially common in countries like Japan, or along long-distance hiking routes such as the Camino de Santiago.
Here’s how they can help:
- Free Up Your Days — Send most of your luggage ahead to your next hotel, and just carry a small bag with clothes and toiletries for the journey.
- Stay Flexible — Without a heavy suitcase, you can explore more freely — hopping on trains, wandering city streets, or tackling long walks without breaking your back.
- Plan Ahead — Do a quick search for your destination before you go to see what’s available, and book in advance if possible.
Example: If I were bouncing between hotels while traveling from Tokyo to Kyoto, I’d ship my big bags ahead and just carry a day or two of essentials. By the time I arrived in Kyoto, my luggage would be waiting for me at the hotel — and I’d have had two hands free for ramen, shopping bags, and maybe even a paper fan or two.
📡 Staying Connected Abroad
Staying connected abroad can feel complicated, but it really comes down to a handful of options — each with pros, cons, and price tags.
- International Carrier Plans — Many U.S. cell providers offer daily “roaming passes” ($10–15/day) that let you use your regular number and service abroad. It’s the easiest option, especially if you’re hopping between multiple destinations, but it adds up fast.
- WiFi Reliance — Free WiFi is more common than you think — from chains like Starbucks to public transit hubs and parks. But don’t assume it’s a given everywhere. Example: in Cuba, U.S. cell phones don’t work at all, and WiFi is limited to a few public parks or fancy hotels. Translation: hard mode.
- Pocket WiFi Rentals & eSIMs — In many countries you can rent a portable WiFi device or grab an eSIM plan (if your phone supports it). In Japan, for example, you can reserve ahead of time and pick it up at the airport, ready to go.
- Buy Your Own Hotspot — I recently invested in a Solis mobile hotspot. It comes with 1GB of data per month for life, plus flexible plans for more (pay-as-you-go data or unlimited daily/monthly passes). A good option if you travel frequently.
- Communication Apps — Unless you’re on your carrier’s plan, normal calling and texting won’t work. Instead, plan ahead with apps like WhatsApp, Messenger, or even Zoom. Make sure your family/friends have them downloaded and set up before you leave.
Peace of mind isn’t just about safety — it’s also knowing you won’t be stranded trying to FaceTime your ride from a random airport with zero signal.
😴 Jet Lag Survival Guide
One of the biggest drawbacks to far-flung travel is the way jet lag can smack you around those first few days. And it’s not just sleep — mental clarity, mood, and even gut health can get knocked out of whack.
So what to do? Two main strategies:
- Power Through — The classic approach. Sleep as much as you can on the plane, then stay awake until a normal-ish bedtime once you land. Easier if your flight gets you in mid-to-late afternoon (like when I arrived in Greece — dinner, hotel, bed). Brutal if you land first thing in the morning.
- Pre-Shift Your Schedule — My personal favorite. I start adjusting at home — ideally two weeks ahead, shifting my wake/sleep an hour earlier every few days until I’m closer to my destination’s time zone. By departure day, my 3am wake-up at home feels like 10am destination time, and I don’t waste my first morning being dazed and confused (well, no more than normal at least).
If that long pre-shift sounds impossible, there are shortcuts: my friend swears by the Timeshifter app (first trip free, then $24.99/year). It builds a custom plan with hour-by-hour tips on light exposure, caffeine, naps, melatonin, and sleep times.
Here are the basic principles I use to keep myself on track:
- Plan Your Schedule — Work backwards: wake time → bedtime → wind-down routine → dinner.
- Light Levels — Blue/white light when you wake up; dim/sunglasses/screens-off or in night-more before bed. I love my kindle here – I can read with the lights off and the screen set warm and dim.
- Wake-Up Tricks — Light exercise, coffee, puzzle games to keep me from dozing back off. Turn on all the lights, and turn up the brightness / turn off night-mode on my phone.
- Exercise Boost — More movement during the day = better sleep at night.
- Caffeine Rules — Yes in the morning, no later than 8–10 hours before bed.
- Wind Down — Reading, journaling, yoga, or even an audiobook I’ve heard before (Harry Potter dreams get weird if you forget the timer).
- Melatonin — Small doses 30 minutes before bed, plus tiny “middle of the night” doses if I wake up too early. Test at home first, not at 30,000 feet!
Jet lag may be unavoidable, but it doesn’t have to ruin your trip. With a little planning, you’ll spend less time staring at the ceiling at 3am… and more time eating your way through street food stalls like a normal human. Or like me, anyway… I never claimed to be normal.
📁 Organizing Docs & Itineraries Like a Pro
Always print your major documents and itineraries before traveling. Keep digital copies on your phone, and send them to a friend or two (a travel companion + an emergency contact at home). Yes, it feels like overkill to print it all… until the one time out of a hundred you actually need them. And trust me, there’s no way to know when that one time will be.
I also LOVE to make spreadsheets covering every detail — itineraries, TikTok recs, notes from travel books. (Nerd alert.) The one sheet I always create — and recommend in some form for big trips — is a master itinerary table. Mine usually includes:
- Flights — dates, flight numbers, confirmation codes.
- Accommodations — reservation numbers, addresses, “night 2 of 3” type notes.
- Booked Tours & Travel — anything that’s paid or reserved in advance.
- Daily Location — which city or neighborhood I’ll be in.
- Emergency Info — passport details, emergency contacts, and fellow traveler info at the bottom (because if I ever do need it, it’ll be urgent).
Even if you don’t build a mega-sheet like me, gather your details into one place — ideally printed — so they’re at your fingertips if you need them.
And for the fun stuff? I keep a simple list of restaurants, shops, and spots I’ve bookmarked, organized by neighborhood. That way, after I see the Sagrada Familia, I’ve already got a list of cafés and tapas joints nearby instead of zigzagging across Barcelona like a lost pigeon.
TL;DR: Be nerdy now, thank yourself later.
💰 Cash, Cards & Currency Exchange Tips
Changing your home currency abroad can be blessedly simple… or a little tricky, depending on how you do it. From the moment you step off the plane, you’ll see exchange counters everywhere. Convenient, yes — but often the worst rates. If you want the best value, here are some strategies:
- Order Currency from Your Bank (Before You Go) — For common currencies (Euros, Pounds, Yen), most banks can order cash for you in a few business days. Easy, reliable, and usually the best rate.
- Use Local Bank ATMs — Often the cheapest way to get cash abroad. But research first: know your bank’s foreign transaction fees, and stick to real bank ATMs, not sketchy standalone machines in corner shops.
- Japan twist: the best ATMs are inside convenience stores like 7-Eleven, Family Mart, and Lawson’s. Because Japan just has to be different — easier and more efficient, yes, but always different.
- Cash-for-Cash at Banks — Travelers checks are basically extinct, but large bills of your home currency can often be swapped for local cash at teller windows. Not the best rates, but it works in a pinch.
- Credit Cards — Bring at least one card with no foreign transaction fees. Always choose to be charged in the local currency, not your home one (the rate is better every time). Cards are widely accepted, but not everywhere — in Japan, for example, cash is still king. Keep a little local currency on hand for small shops, food stalls, and transportation.
- Alert Your Bank — Before you go, let your bank and card companies know you’ll be traveling, so they don’t freeze your account for “suspicious activity.”
The bottom line: mix and match. I carry one solid no-fee credit card, some local cash for daily life, and the knowledge that if my card doesn’t swipe, there’s an ATM waiting to bail me out.
🚨 Break Glass in Case of Emergency: Info to Gather Ahead of Time
Nobody likes to think about emergencies on vacation, but a little prep now can save you a world of trouble later.
Here’s what I always make sure I have covered:
- Know the Numbers — Every country has its own version of 911 (for police, fire, ambulance). Look it up before you go and jot it down in your phone and your printed itinerary.
- Embassy & Consulate Info — Write down the address and phone number of your country’s embassy or nearest consulate. They’re the people who can help if you lose your passport, get into legal trouble, or need evacuation in a crisis.
- Insurance Hotlines — If you’ve bought travel insurance (and I hope you did after my gorilla story), keep their 24-hour emergency line somewhere obvious.
- Local Emergency Contacts — If you’re visiting friends, traveling with a tour, or staying somewhere with a local host, have their contact info handy in case you need fast help on the ground.
- Paper & Digital Backups — Phones die and WiFi drops. Keep a small card in your wallet with your emergency contacts, insurance policy number, and embassy details.
✨ Emergencies are rare, but they happen. If you’ve got your basics written down and stashed in a few safe places, you’ll spend less time panicking and more time actually solving the problem. And if I get abducted by a gorilla, at least someone will know where to start looking.
📱 Travel Apps Worth Downloading
These are the apps I keep on my phone (and actually use) when I’m traveling — plus a few that friends swear by.
Lodging & Transportation
- Uber / Local Rideshare Apps — Uber doesn’t work everywhere, but it’s the safest bet in places like Greece. In some countries, local rideshare apps (like GoTaxi in Japan) give drivers a bigger cut and keep more money in the local economy — a win-win.
- Expedia — flights, hotels, and bundles — my go-to when I’m flying by the seat of my pants and booking details as I go!
- Airbnb / VRBO — vacation rentals, plus local “Experiences.”
- Turo — short-term car rentals, easier and less expensive than the big chains for one-day trips.
- Airline or Cruise Apps — always download the one for your carrier.
- Local Public Transit Apps — for schedules, tickets, and real-time updates.
Planning & Activities
- TripIt — organizes your bookings into a master itinerary.
- Atlas Obscura — quirky, off-the-beaten-path attractions.
- Viator / GetYourGuide — book tours, tickets, and experiences.
- Tripadvisor — reviews, recs, and forums for travelers.
- Guidebook Apps — Lonely Planet (my fave), Fodor’s, and even Rick Steves Audio Europe for self-guided walking tours with great commentary.
Everyday Essentials
- Google Maps — download offline maps and save must-visit pins.
- Google Translate — text and camera translation for menus, signs, conversations.
- XE Currency — live exchange rates so you know what you’re spending.
- WhatsApp — the world’s most common messaging app, perfect for staying in touch abroad.
- Rome2Rio — shows you all the ways to get from A to B (planes, trains, buses, ferries, cars).
Food & Drink
- Eater — my favorite site for local food recs, now in app form. They cover everything from tiny hole-in-the-wall shops to world-class fine dining.
- Yelp — yes, it’s hit-or-miss, but in some cities it’s still the go-to for quick local food finds.
- HappyCow — indispensable for finding vegetarian/vegan options anywhere.
- The Infatuation — trendier city-focused recs with a focus on what’s cool and tasty.
- Reservation Apps — OpenTable and Resy are widely used in the U.S. and parts of Europe. In Asia and elsewhere, locals use their own apps (like TableCheck in Japan or Chope in Singapore).
Download what you’ll actually use — and before you go, google “best apps for visiting [Destination]” to find the local favorites for food, transit, and more. The last thing you need is 47 apps you forget exist until you’re back home.
📆 Epic Travel Prep Timeline (Free PDF)
Big trips don’t start on departure day — they start months before. From checking visas three months out to shifting your sleep schedule a week before, timing matters. To make it easier, I built a printable Epic Travel Prep Timeline so you know exactly what to do (and when).
🏡 Managing Home Life: From Launch Pad to Landing Zone
Epic trips don’t just happen on the road — they begin with the systems you set up at home and end with how gently you let yourself land when you return.
📝 Before You Go: Home Prep Priorities
The more you can clean and prepare your home before leaving, the sweeter it will be to return. That said, plenty of “would be nice” tasks (ahem, scrubbing the toilets) aren’t essential. If you can afford it, booking a house cleaner to come just before you go — or even while you’re away, if you have one you trust — is one of the best gifts you can give your future self. Below are the must-dos and my top priorities in the “optional but wonderful” category.
- Self-Care Prep
In the week before I leave, I try to get as much upkeep out of the way as possible. For me, that usually means a haircut and color, plus waxing, brow tinting, or even a lash lift and tint. A mani-pedi, facial, or massage are nice extras. Basically, I want to look my best in photos and start off with a relaxed mindset. - Empty the Fridge
If it doesn’t have an infinite shelf life (think mustard or pickles), it goes. Nobody wants to come home to a science experiment of mold and mystery smells. Bonus: if a storm or outage delays your return (I once had to stay away for a month after a hurricane knocked out power), you’ll be so glad you were thorough. - Tidy & Clean
I focus on putting things away and decluttering so the house feels calm and organized. Fresh sheets are always worth it. A full top-to-bottom clean is great if I can squeeze it in, but not worth stressing about if I can’t. - Plant Care
Most of my plants are hardy succulents, so a deep soak keeps them happy for a month. Two days before lift-off, I fill my sink with water, let batches soak for a few hours, then drain. Heavier = happier plant. The three needier birches head to a plant sitter. - Arrange a House Check
Give a trusted friend a key and ask them to swing by once a week to collect mail and keep an eye on things. My downstairs neighbor does this for me, and it cuts down on all those “what if” worries. - Pause Auto-Deliveries
Skip, postpone, or cancel anything scheduled to arrive while you’re away — from Amazon packages to coffee pods. Saves you from boxes piling up or deliveries gone missing. - Final Walk-Through
My last ten-minute checklist before heading out the door:- Make the bed (nothing better than fresh sheets when you stumble in after a long flight).
- Give big planters a last drink.
- Switch the water heater to “vacation” mode.
- Set thermostat to eco levels (78°F in summer, 55°F in winter). Bonus points if you can adjust remotely with a Nest.
- Deal with sponges (toss or run through dishwasher).
- Take out the trash and replace the bag.
- Run the dishwasher, even if it’s only half full.
- Do a security sweep: lock windows, check lights/blinds, and double-check the doors.
- Close the door behind you and off you go — adventure awaits!
🛋️ Coming Home Gently: Resetting After a Big Trip
After a trip of this magnitude, the last thing you want is to dive straight back into “real life.” You’ll be tired, your schedule will be off, your body will ache from long flights, and you’ll have a mountain of laundry waiting. Worst of all, you’ll be trading fun and freedom for routines and responsibilities — like the Sunday Scaries times a million.
My rule of thumb: for every 10 days of travel, I give myself one extra recovery day before resuming normal life. After this 30-day trip, I’ll be taking at least 3–4 days before I even let people know I’m back in town. Here are my go-to strategies for recuperating and resetting:
- Restock
First stop: the grocery store. I grab milk for coffee, a quick dinner option (frozen pizza, salad kit), and my usual basics so I can settle back in without stress. - Take a Total Rest Day
If I can swing it, I devote an entire day — or at least a half-day — to doing absolutely nothing. No cooking, no laundry, no socializing. Just naps, easy delivery food, silly movies, and letting my brain go soft. - Reset My Stuff
This means unpacking and tackling laundry. With luck, I left the house clean, so all I have to wrangle is the chaos I brought back with me. - Reset Myself
My favorite splurge is booking a massage or facial, followed by a bath, mani-pedi, or even a haircut. After weeks on the road, my body, skin, hair, and brain are all ready for some TLC. - Reflect
Epic adventures deserve processing. Shortly after returning (sometimes even on the flight home), I like to go through photos, make albums, and journal. A few reflection prompts to get started:- What was the best day of the trip, and what made it so great?
- What was the best food I ate? Did I try anything new?
- What was my favorite interaction with another person?
- What was the low point of the trip, and how did I get through it?
- What do I wish I had done differently, or added in?
- How do I feel now about all the things I saw and did?
Coming and going well isn’t just about logistics — it’s about giving yourself space to reset, breathe, and ease back into life. When you manage your home and recovery with intention, you’re not just tidying your space or pampering your body, you’re also creating the conditions to land softly. That foundation makes it so much easier to care for your mind and spirit too — which is where sobriety and mental health come into play on any epic journey.
🧠 Staying Grounded: Sobriety & Mental Health on the Road
Epic trips stretch more than your suitcase — they stretch your routines, your energy, and sometimes your coping tools. While travel can be joyful and life-changing, it also stirs up stress, fatigue, and moments of vulnerability. For those of us in sobriety, or anyone prioritizing their mental health, it’s worth planning just as carefully for your inner world as for your luggage.
I have a whole section on Traveling While Sober with detailed tips and resources, and a great article about How to Travel in Sobriety, and Why It’s Such a Big Deal, but here are the practices I lean on most when I’m on the road:
Give Yourself Grace
Travel is intense. Feelings will surface — excitement, anxiety, homesickness, overstimulation. None of them mean you’re failing. Sobriety isn’t about perfection; it’s about building a life that’s bigger, kinder, and freer than the one you left behind.
Bring a Sober-Safe Sidekick
If possible, travel with someone who supports your sobriety. A buddy who knows your goals (and has your back) quiets that little voice that says “no one’s watching.” It makes staying present and connected so much easier.
Plan Activities That Don’t Revolve Around Booze
Skip the bar crawls. Cooking classes, food tours, street markets, hikes, photography walks — the world is full of ways to explore without a drink in hand. Choose experiences that light you up, not ones that drain you.
Rest and Reset
Exhaustion is a sobriety killer. Prioritize sleep, hydration, and movement, even if that means skipping a plan you already paid for. Your mental health is your responsibility — no one else’s. And on the flip side, you are not responsible for managing anyone else’s moods, triggers, or choices.
Check In Daily
Build in a quick connection point with your support system — a call, a text, or a Zoom with a sober friend. It doesn’t have to be long, it just has to be consistent. Abroad? WhatsApp and Wi-Fi make it easy.
Have an Escape Route
Stress and temptation happen. Know in advance what you’ll do: duck into a café, go for a walk, or phone a friend. Having a plan means you won’t panic when the moment comes.
Skip the Wine, Splurge on Dessert
If you’re not ordering cocktails, indulge in something else that feels celebratory — a fancy appetizer, the decadent dessert, or that dish you’d normally skip. It’s a joyful way to flip the script.
Watch for HALT
Hungry, Angry, Lonely, Tired — these four states are the biggest pitfalls for sobriety and mental health on the road. Keep snacks in your bag, pause when you’re overwhelmed, reach out for connection, and rest before you crash. A little prevention here goes a long way.
Give Yourself Grace
Travel is intense. Feelings will surface — excitement, anxiety, homesickness, overstimulation. None of them mean you’re failing. Sobriety is about progress, not perfection — and about building a life that’s bigger, kinder, and freer than the one you left behind.
You’ll also find more resources on my Sobriety Hub.
✨ Beyond the Stars ✨
“It seems that the more places I see and experience, the bigger I realize the world to be. The more I become aware of, the more I realize how relatively little I know of it, how many places I have still to go, how much more there is to learn.” – Anthony Bourdain
This world is impossibly vast. There are so many humans in it — each with their own ways of living, learning, eating, and existing — and yet, we are bound together by the threads of our shared humanity. Add to that the mind-blowing majesty of the non-human world — the land shifting beneath us, the kooky animals with their weird little faces and quirky mannerisms — and suddenly there is almost too much to see, do, taste, and learn.
That is why I travel: to have my mind blown over and over, to stand silently dumbfounded in awe of life itself. The truly different, the infinitely magical experiences rarely live on the easy roads; they’re found half a world away, on paths that demand preparation, courage, and a willingness to be transformed.
Epic journeys aren’t just about faraway landscapes or bucket-list experiences — they’re about how you prepare, how you travel, and how you return. From packing smart and setting your home base, to caring for your body, mind, and spirit along the way, every step you take shapes the story you bring back. The best trips don’t just change your passport stamps — they change you.
This page has been a labor of love, and I hope it helps you summon the courage to leap into the unknown, to trust your gut, and to go for it. You deserve this big, wild, messy, wonderful life that only comes from opening yourself up and taking the chance. And maybe, just maybe, I’ll meet you out there — in those unknown lands beyond the stars.